
Twin Tip Toeside Duck Tack
Technique / Intermediate

Another one straight from the twin-tip duck tack toy shop! This is such a fun transition and should confuse the hell out of your peers. If you’ve been working on the heel side variant and the upwind 360, you’ll understand the kite movement and respect for how much the carving of the board counts. The only thing you need to turn this dreamboat into reality is a decent toeside and, if you can find some, a bit of flattish water. The toeside duck tack is a beauty to behold as it really flows; there’s no stepping through or looping of the kite. The secret lies in a good carve and getting the timing right for when to stand up and head back the other way. If you’re ready, let the games commence!
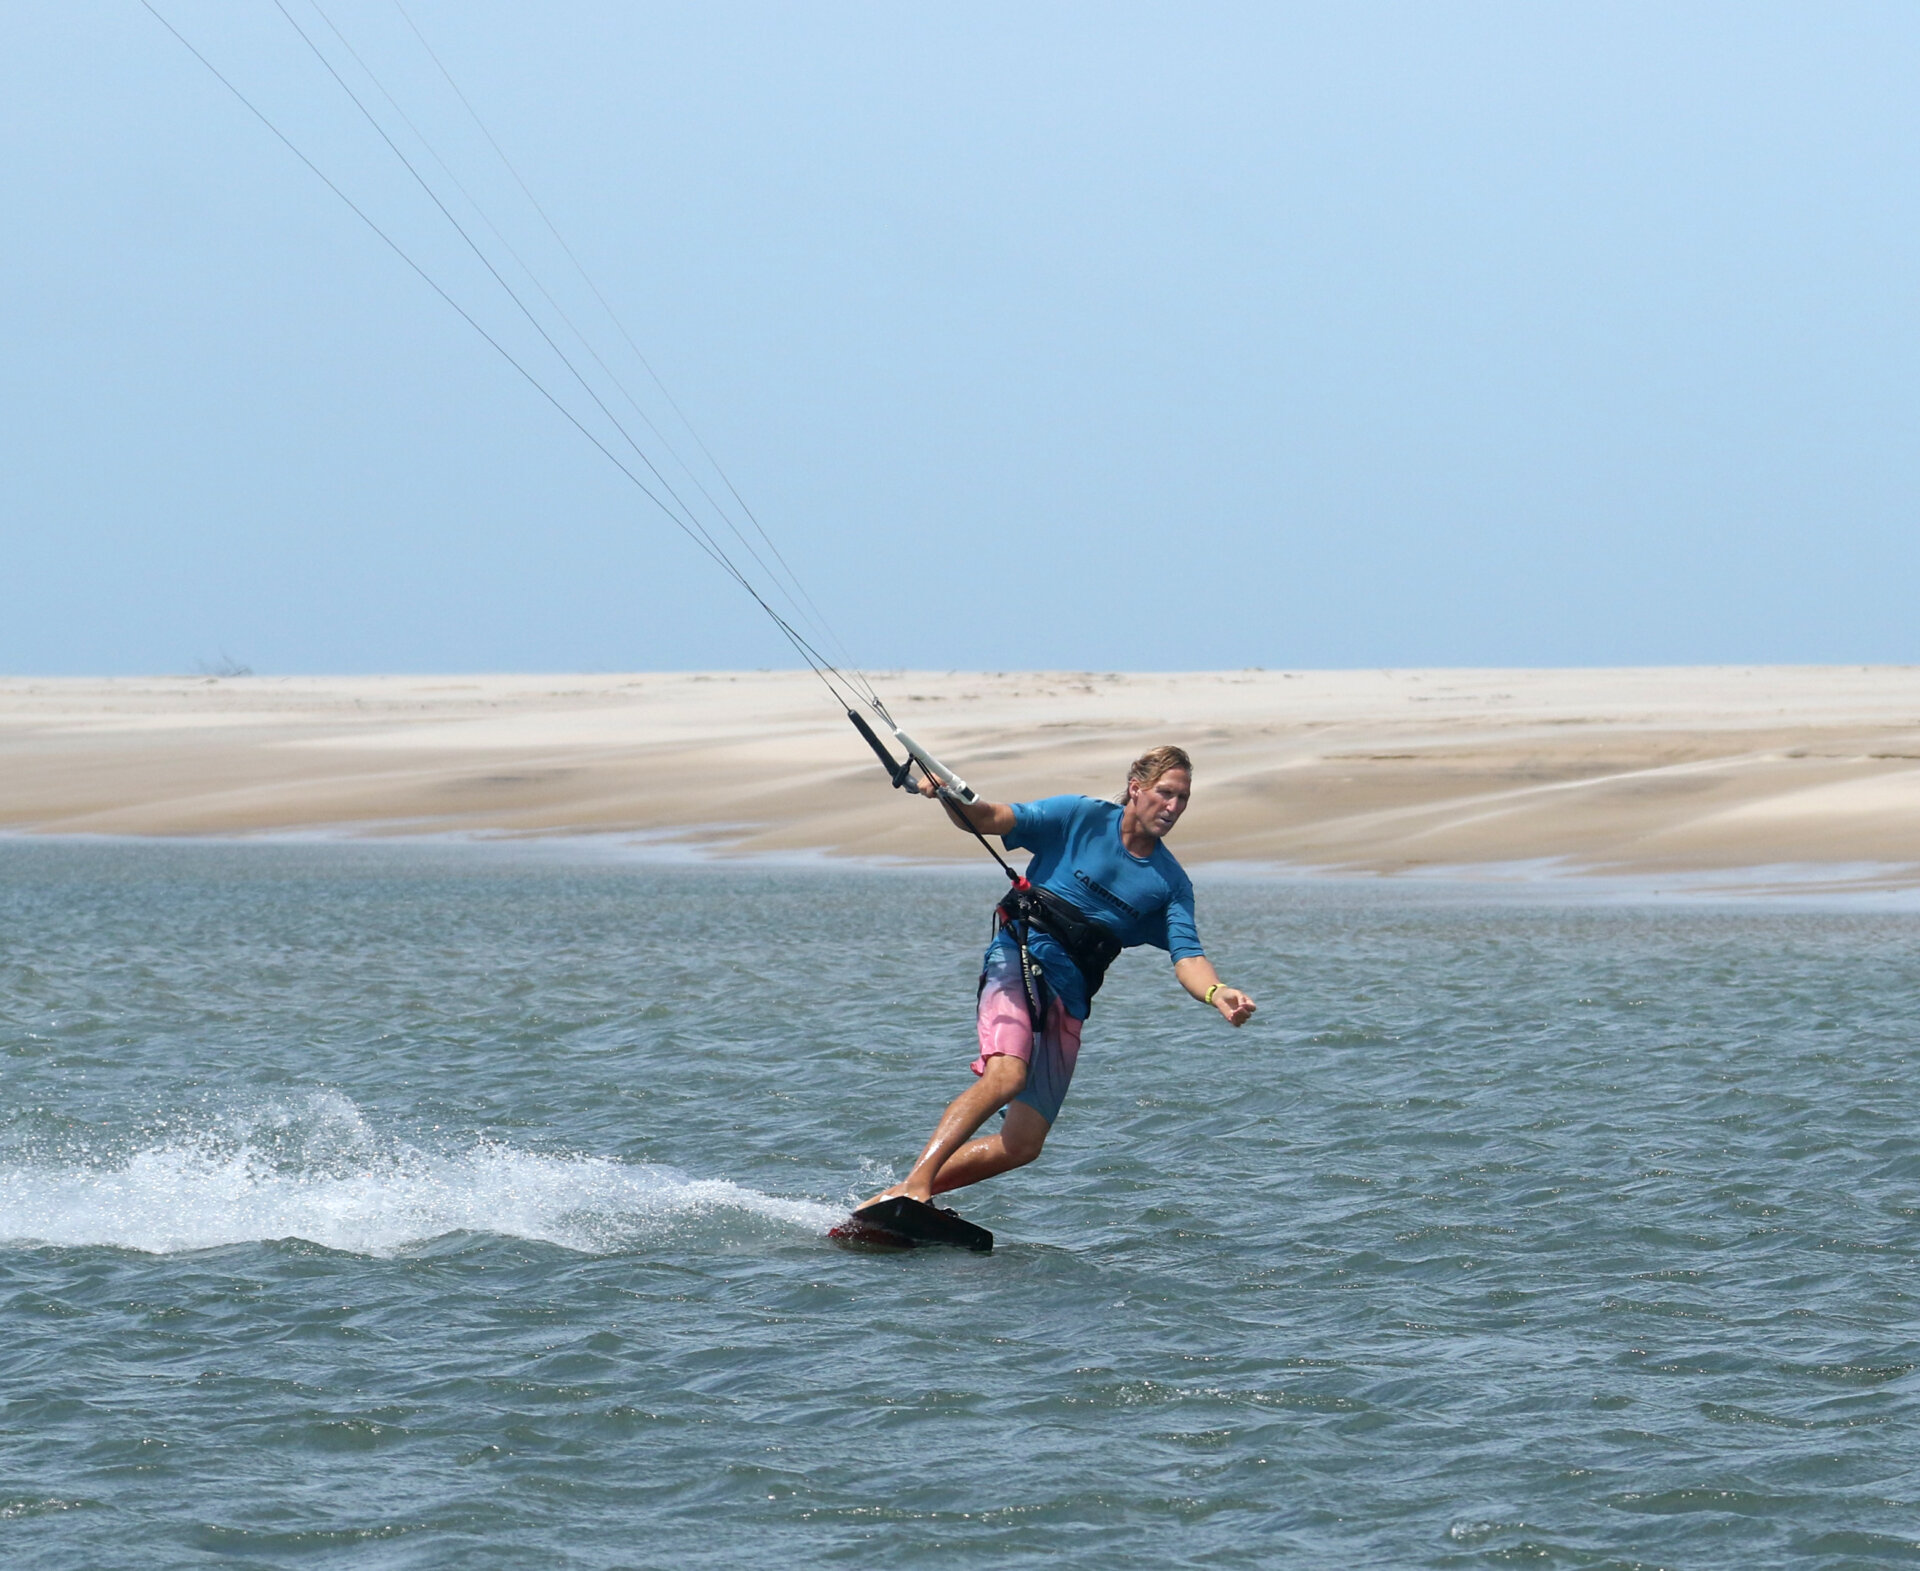
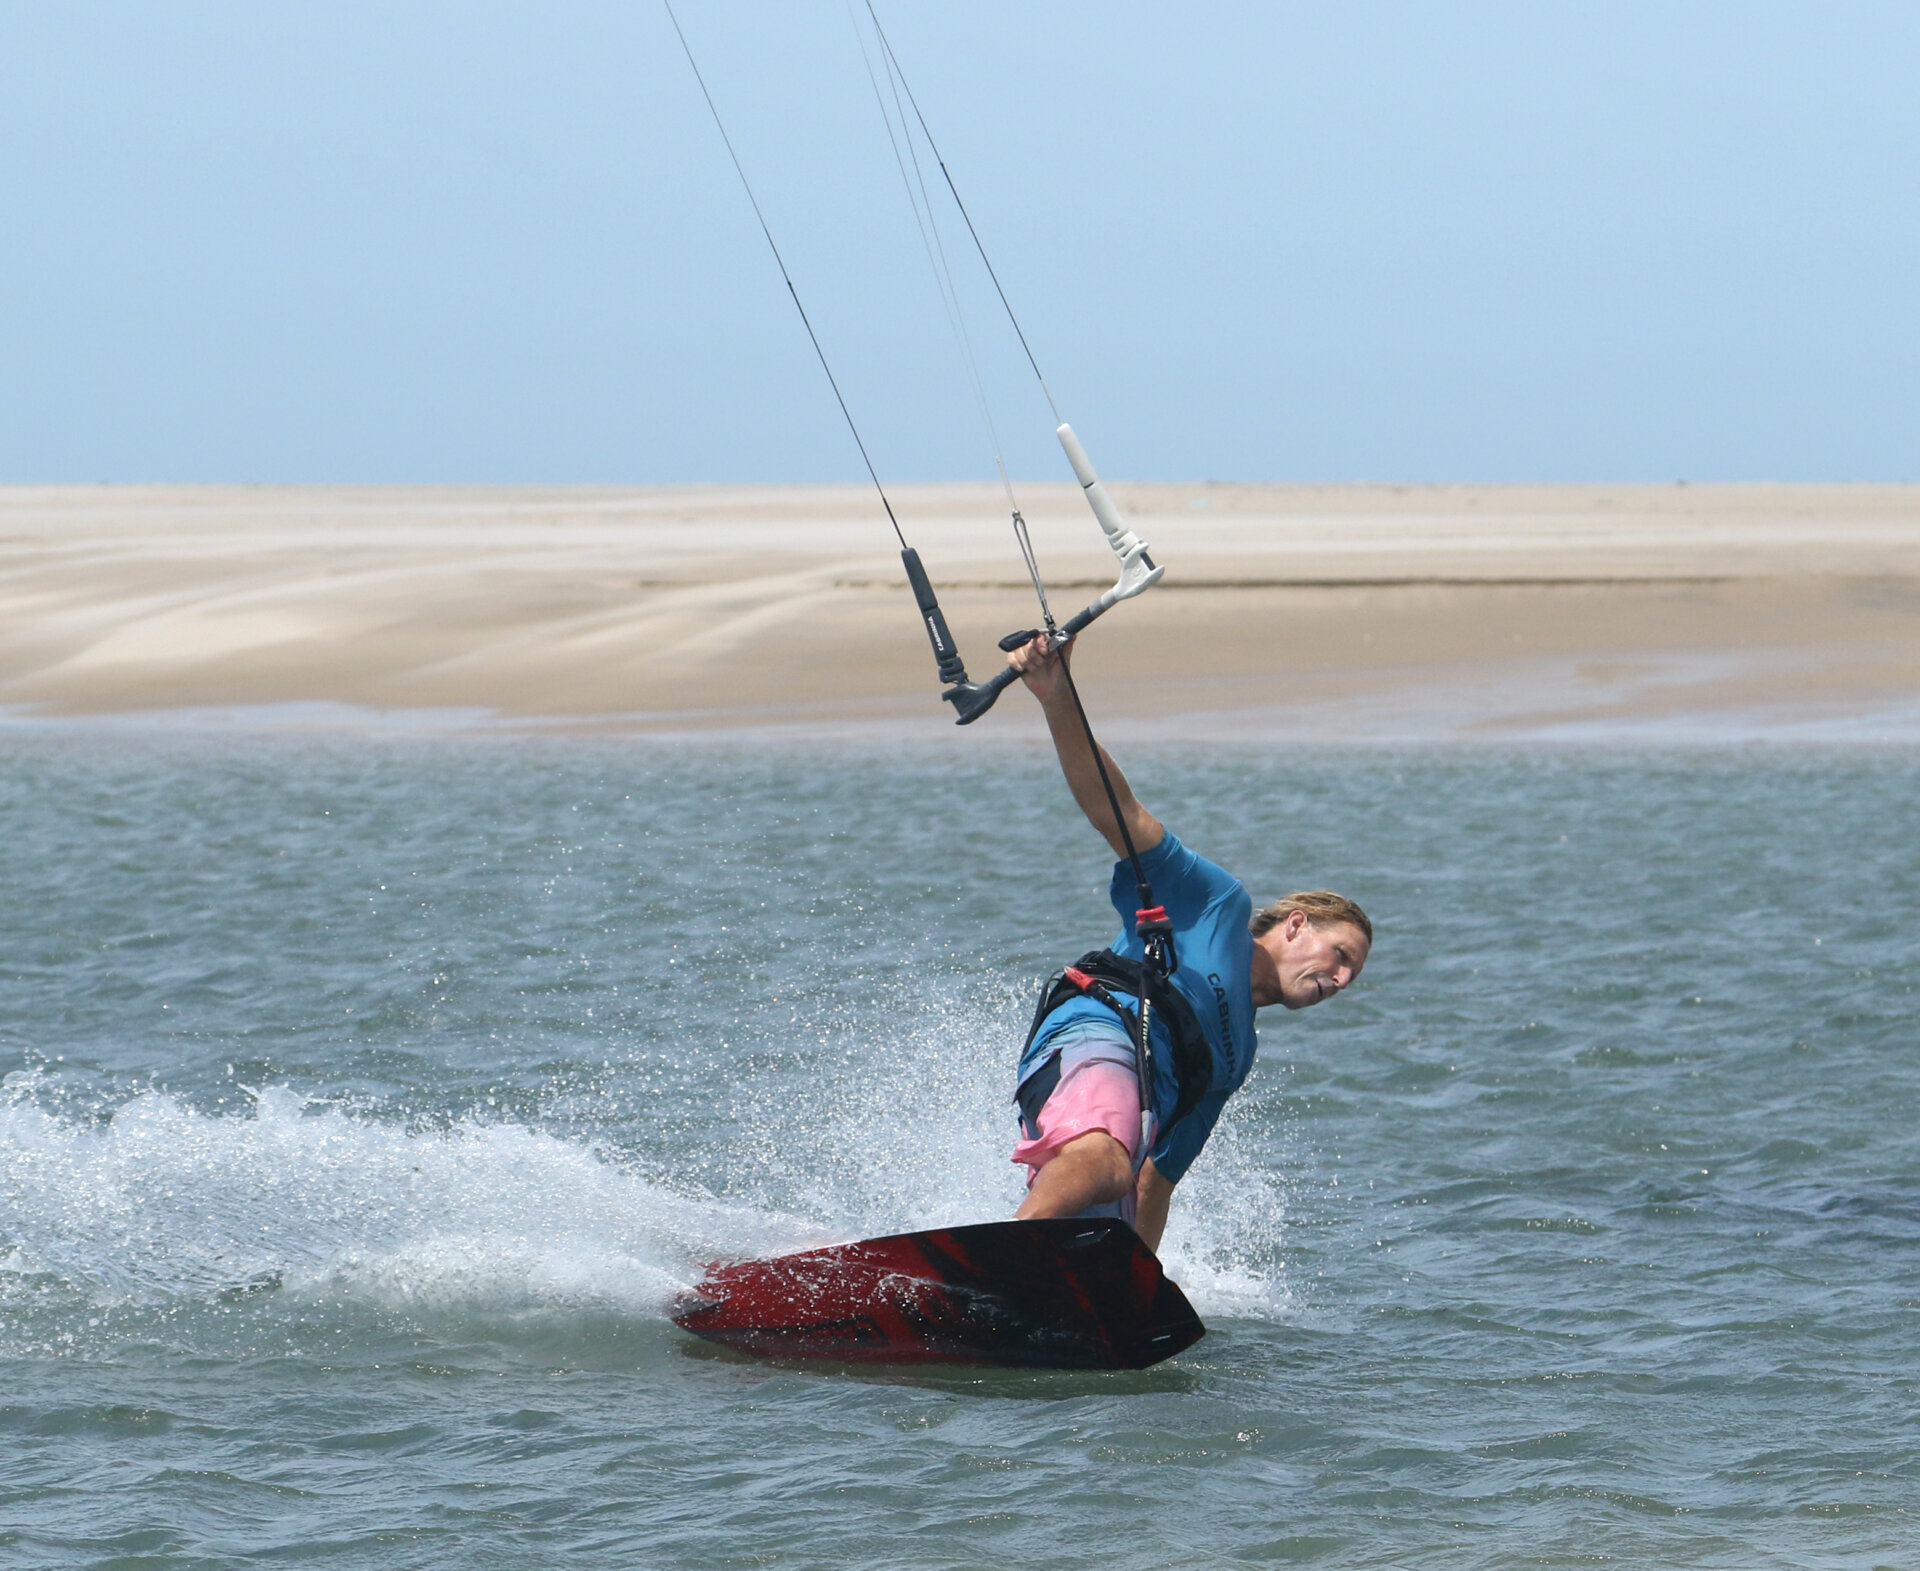
The Approach Pic A.


The same principles apply here as for the other duck tacks. You need some speed to drive against your edge and quickly carve the board and up, into and through the eye of the wind. You need an edge to have tension on your lines so you can steer the kite and feel where it is. And you need to be in a position where you can carve the board. Looking at Christian, you can see he’s edging with all his weight committed into the harness. He’s got his front hand free, and it’ll stay off the bar for most of the move! His sweet spot is trimmed close enough that he can reach the bar and has some throw left. He’s in an open, toeside position, facing forwards, hips open, and both knees driving diagonally across and forwards. The kite is just below 11, which makes it easier to edge.
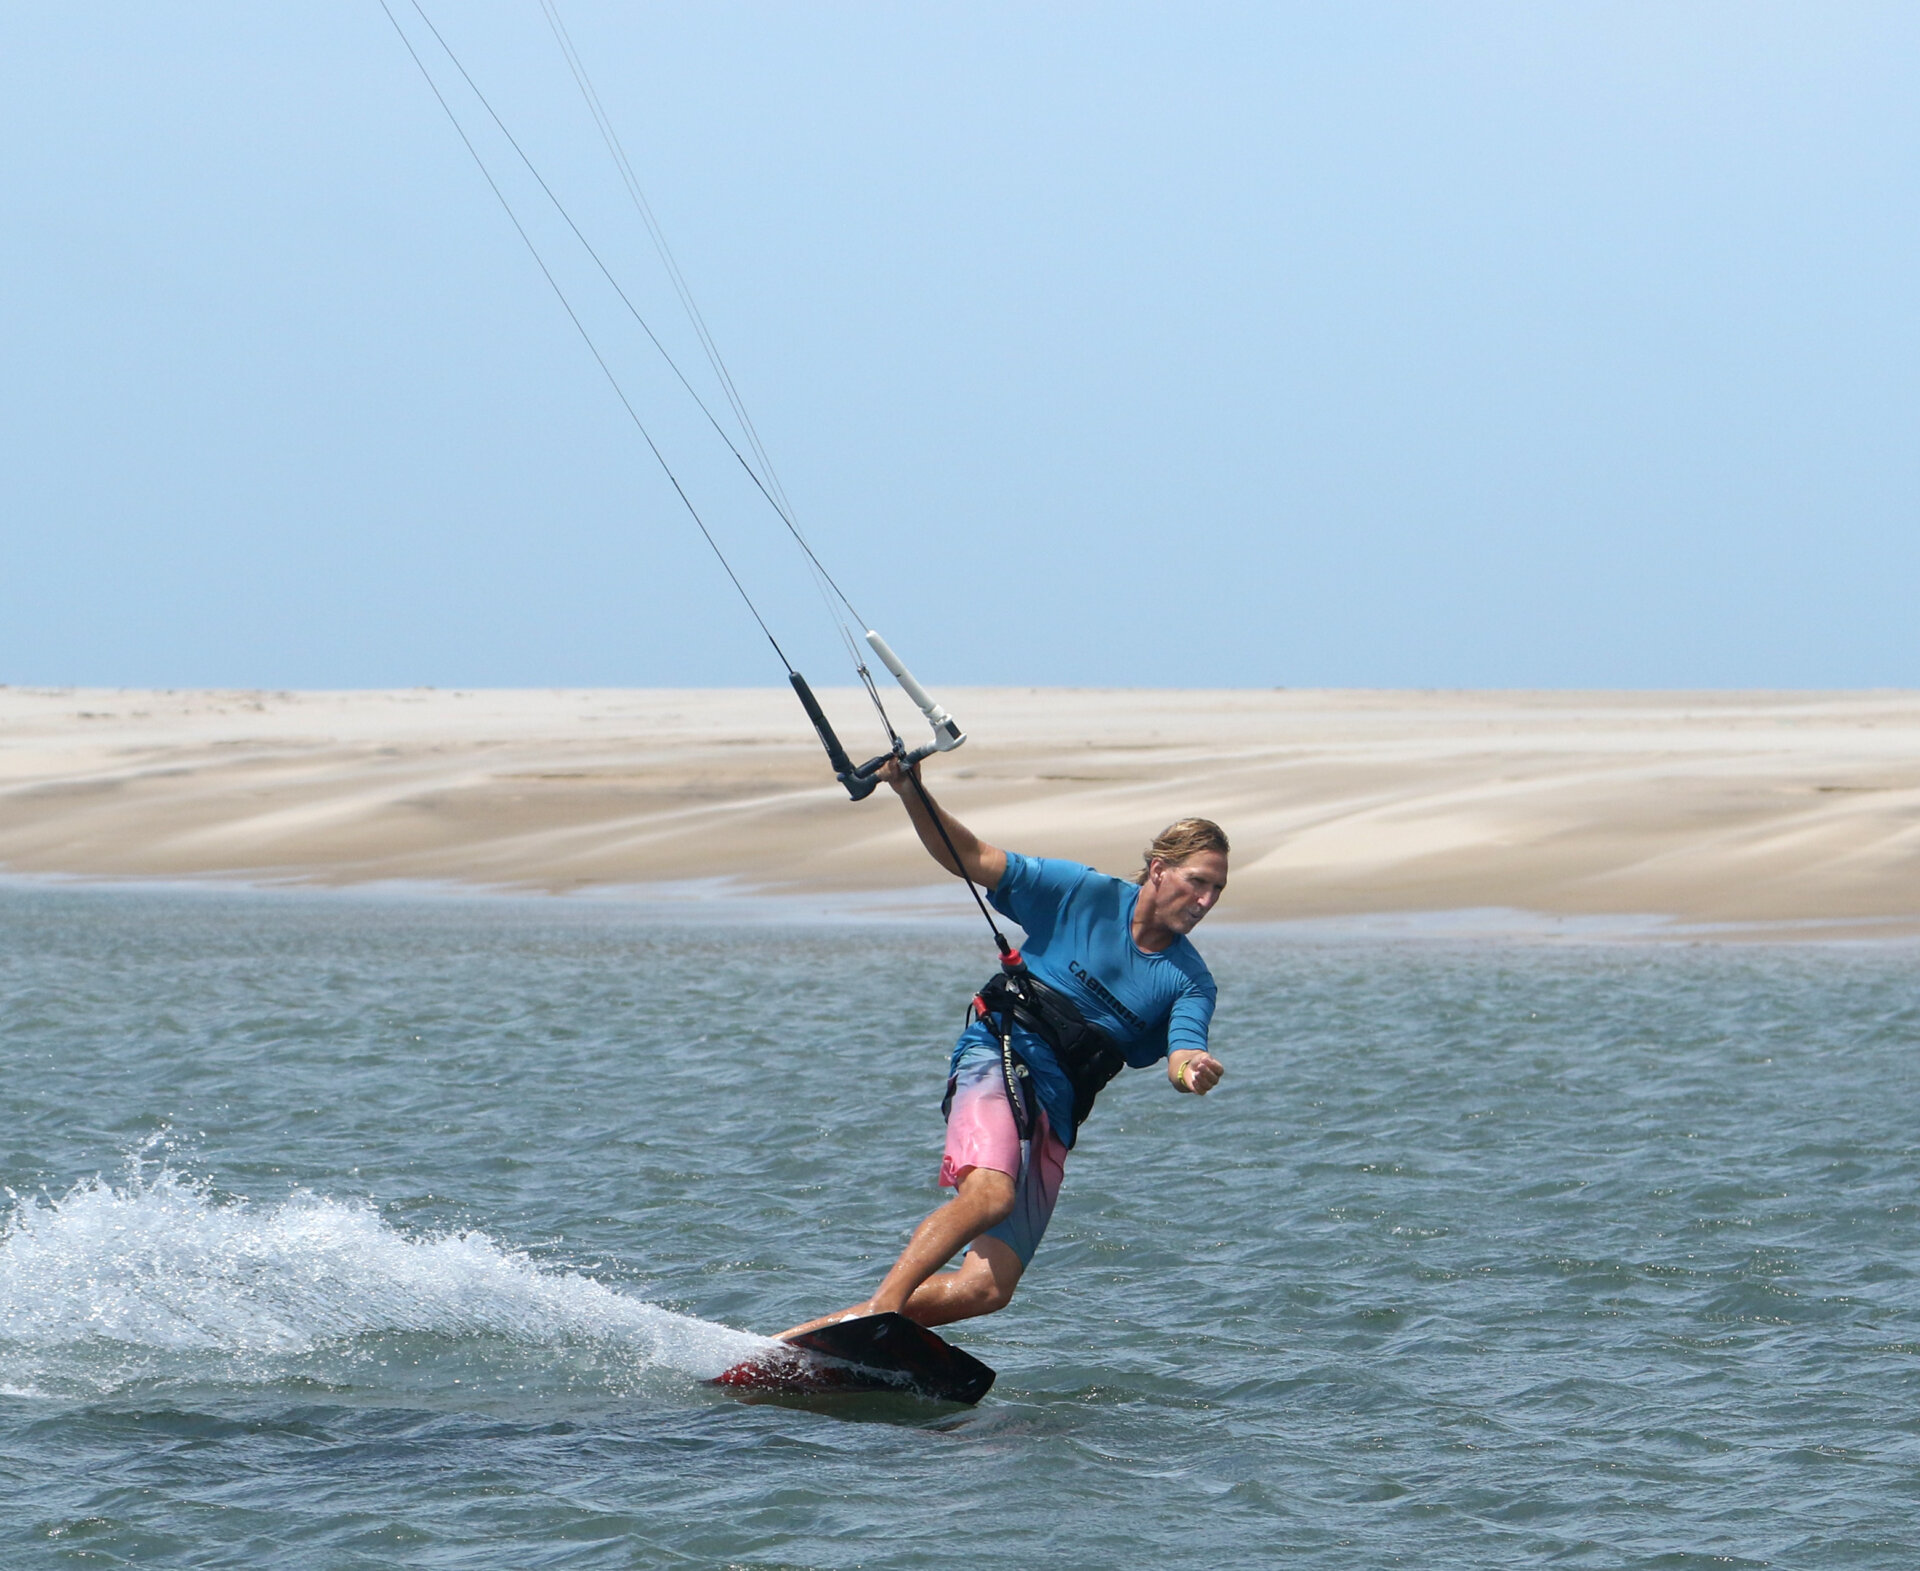
Kite Up Pic B.
Once you’re ready, your first job is to get the kite into position so that you can carve and transition. Drift it up towards 12 o’clock with gentle pressure on your backhand. If you level the bar, that’s enough to get the kite moving. As the kite rises, it will generate more lift. To counteract this, feather the bar out and drop your weight. You can see Christian steering his kite up, dropping his weight whilst letting the kite pull his bar away.
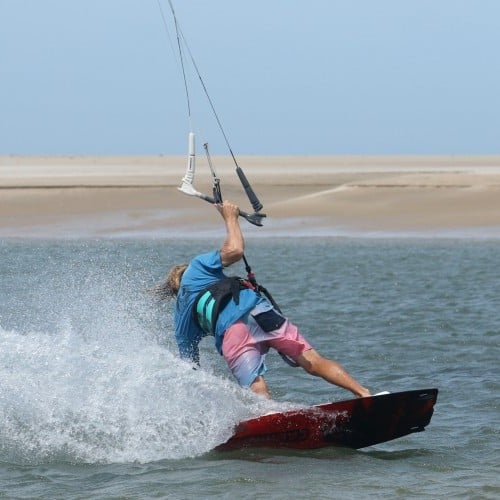
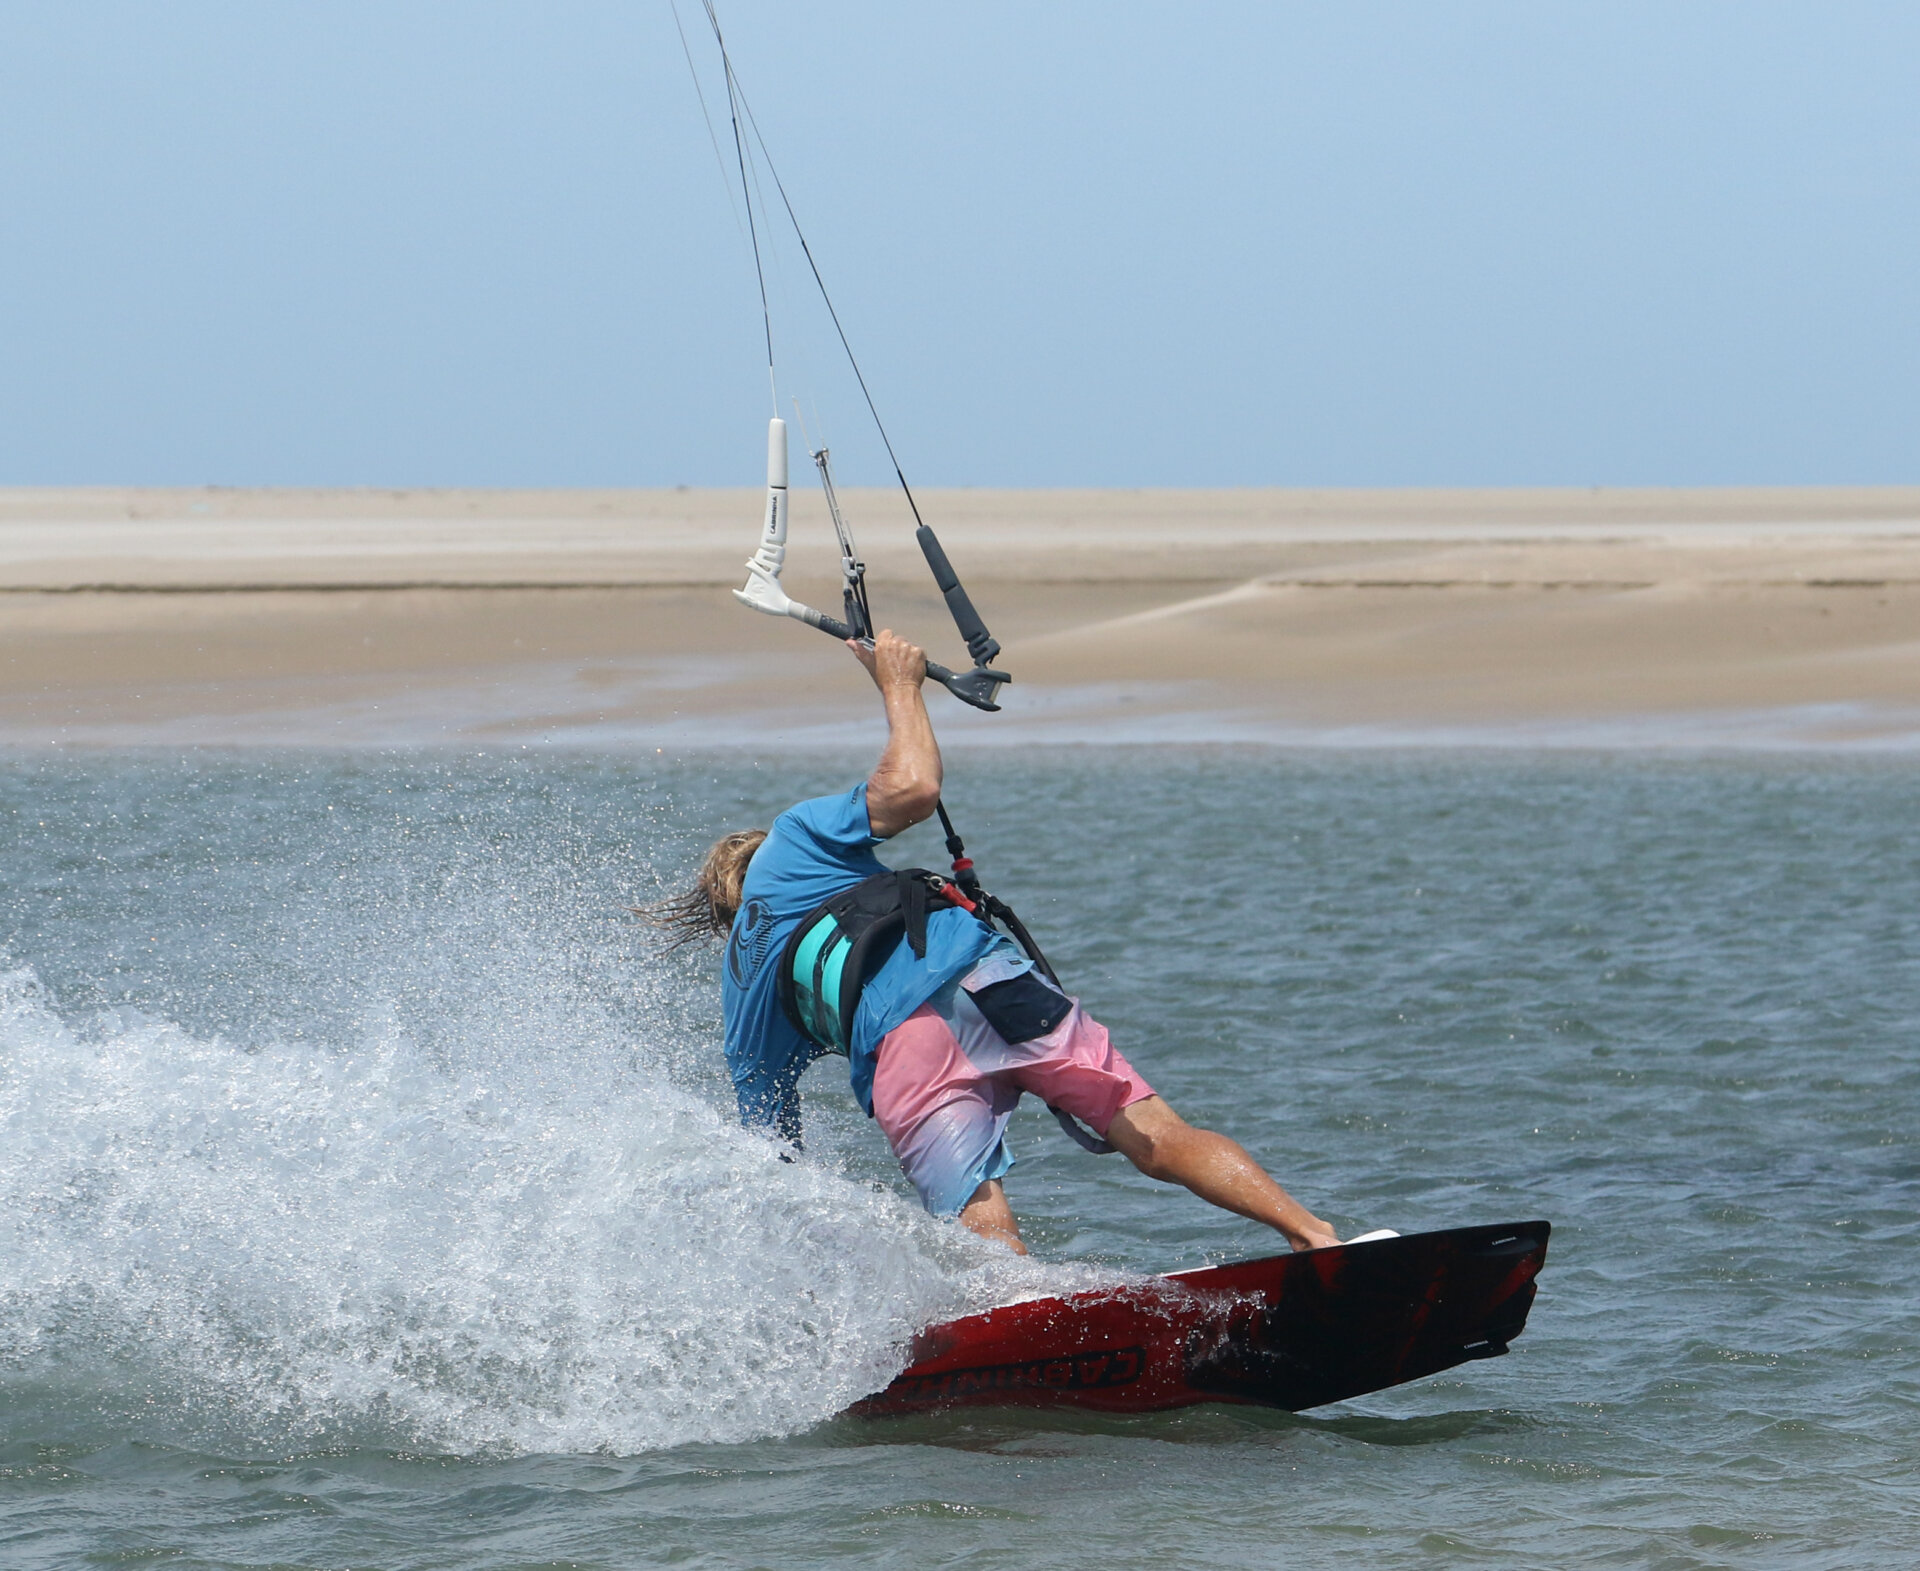
Your Cue Pic C.
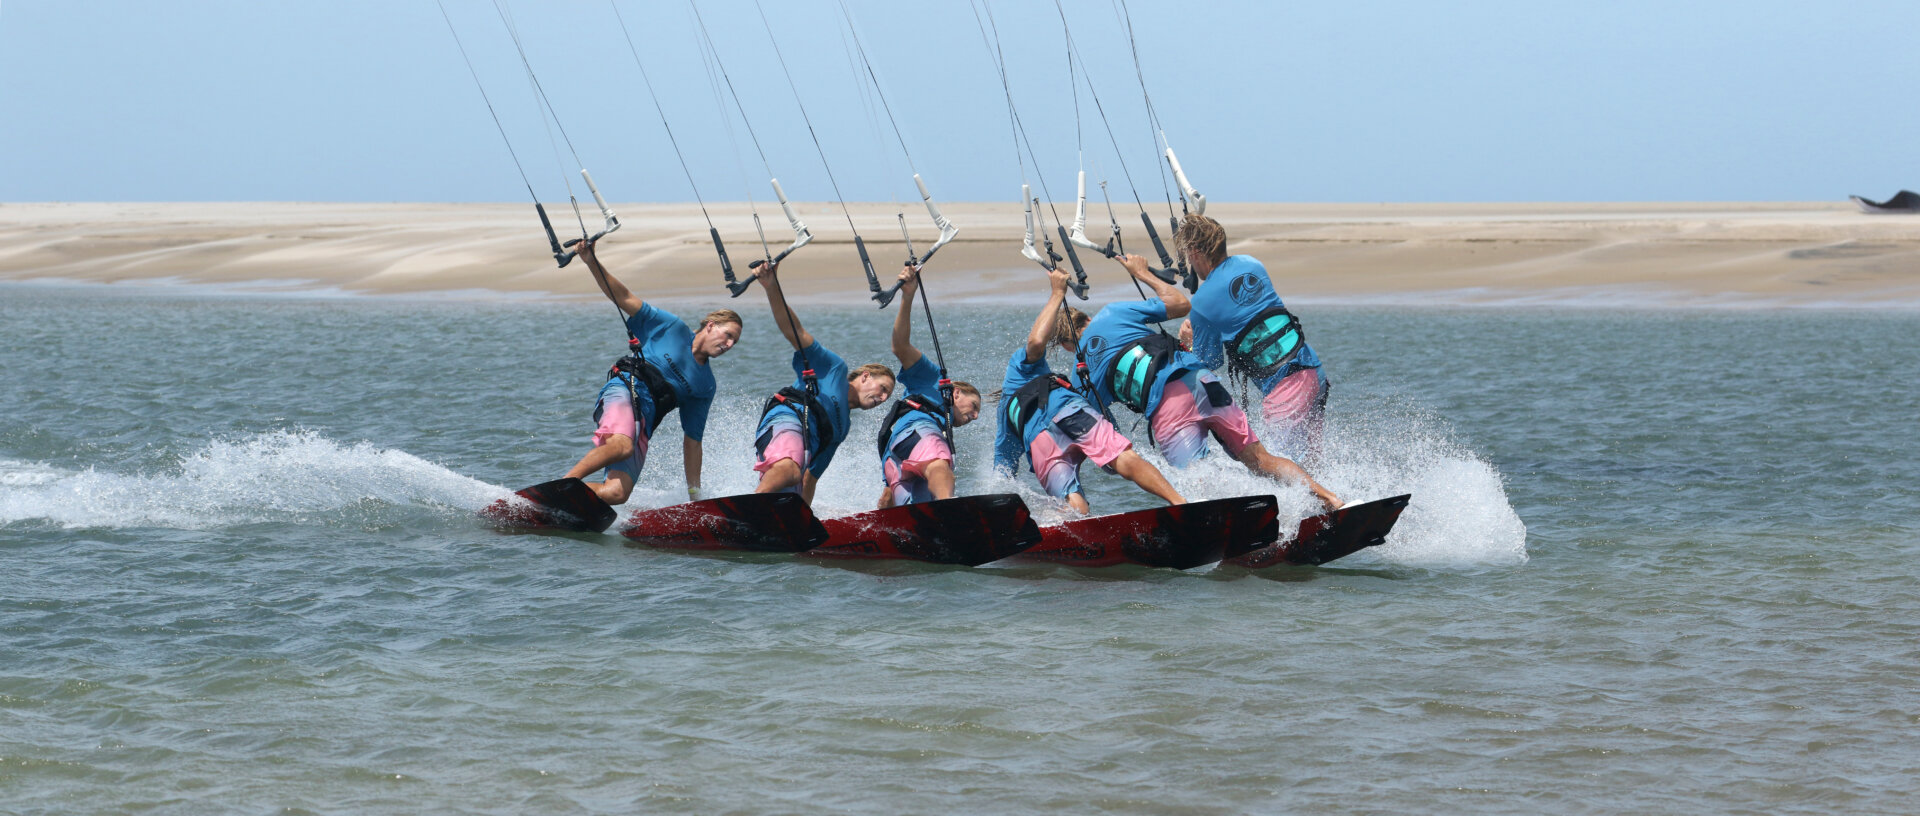
It’s your cue to carve once you’ve pushed the bar away. We’ll pause right here to ponder what you’re about to do. Firstly, you need to get your free hand planted in the water. This isn’t for effect; your hand is the axis you’ll carve, so get it in and keep your arm stiff. This will pull your weight slightly back, which is a good thing as it’ll help you carve off the curved tail of your board. As you reach your hand down, this will drop you even lower, enabling you to fight the lift from your kite, which should now be around 12 o’clock. Looking at Christian, he’s planted his hand; his arm is straight and stiff; he’s lowered his entire truck, read body and hips, looking upwind and driving against his edge.
The Carve Pic D.
This is very much the continuation of the last paragraph and photo. It all needs to happen as a fast, continuous process. You aim to carve the board as hard you can and as quickly as you can so that you’ll get as far as you can:) At the same time, you should keep the kite drifting so that it goes through and past 12, as you’ll need it on the other side as part of your exit strategy! Two things are imperative to guarantee a good carve. Firstly, even though you’re driving through both legs, you need to keep your weight sufficiently over the tail so that it grips; a tiny bit too far forward, you’ll break the tail out and slide. Secondly, you need to keep yourself in a carving position. This means shoulders and hips facing forwards, knees driving forwards. This promotes carving. If you turn your shoulders to the inside of the turn, closing your stance, you’ll lose drive and won’t get far enough. Here, Christian continues to drift the kite; he’s super low with his shoulders and hips aligned and not breaking at the waist. And finally, he’s in an open carving stance, facing forward to drive against the board, arcing it upwind.

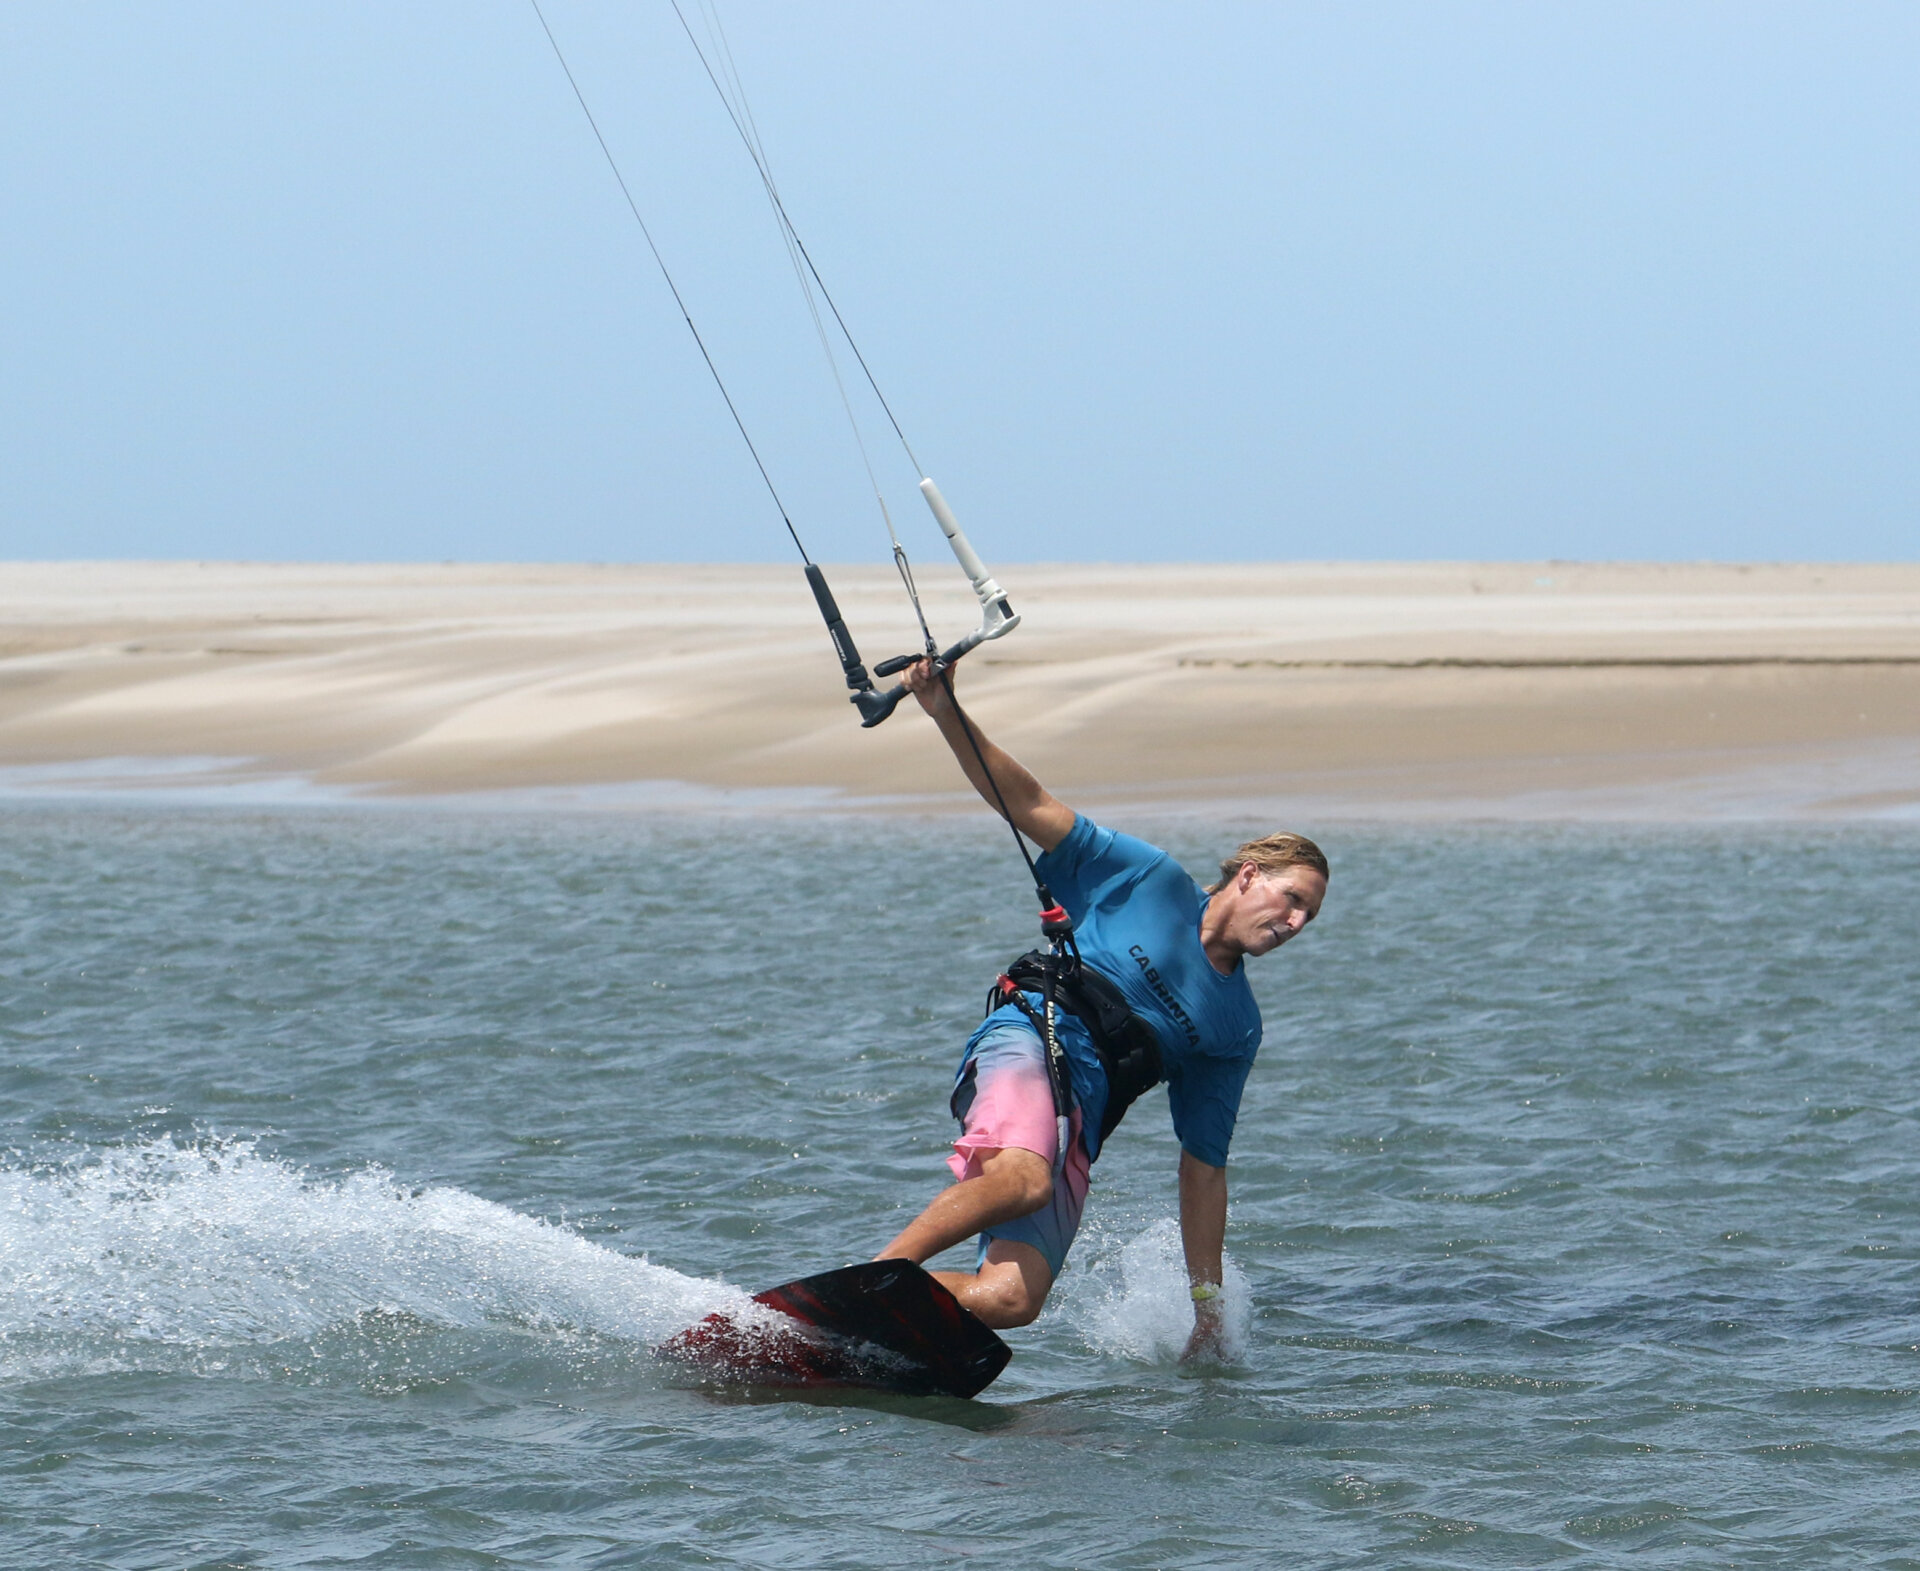
Keep Carving Pic E.
It’s oh too easy to get wrapped up in the future, thinking about getting out of the move before you get there. Don’t worry about making it; concentrate on getting yourself through the wind. You’ll be better positioned to claim it if you get far enough! Look at Christian; he’s still committed to the carve, still in that open stance, driving the board up and through the wind. And he’s still drifting the kite. The wonderful thing here is that as you keep carving, and the kite keeps drifting, you’re going to end up perfectly synchronised and ready to finish the job.
The Magical Duck Pic F.
The reward for your carve. Once the board has gone through the eye of the wind and the kite has passed 12, you’ll be on the correct side of the bar. With your body and head low, you unwittingly ducked the bar as it moved across above you, following the kite! Effectively, by doing little other than carving, the bar has followed the kite to the new side, and you’ve ended up in the right place. As you come around, you need to get balanced on the board. The board will be turning under you, so centre your hips to get weight on both feet and lean against your new front hand, the one on the bar. Resist the temptation to pull the bar in; instead, push against the bar for support. You can see from the spray that Christian has kept his carve on! He’s now putting his weight onto both feet and leaning on his right arm to lift himself. Your kite wants to be on the other side but high.
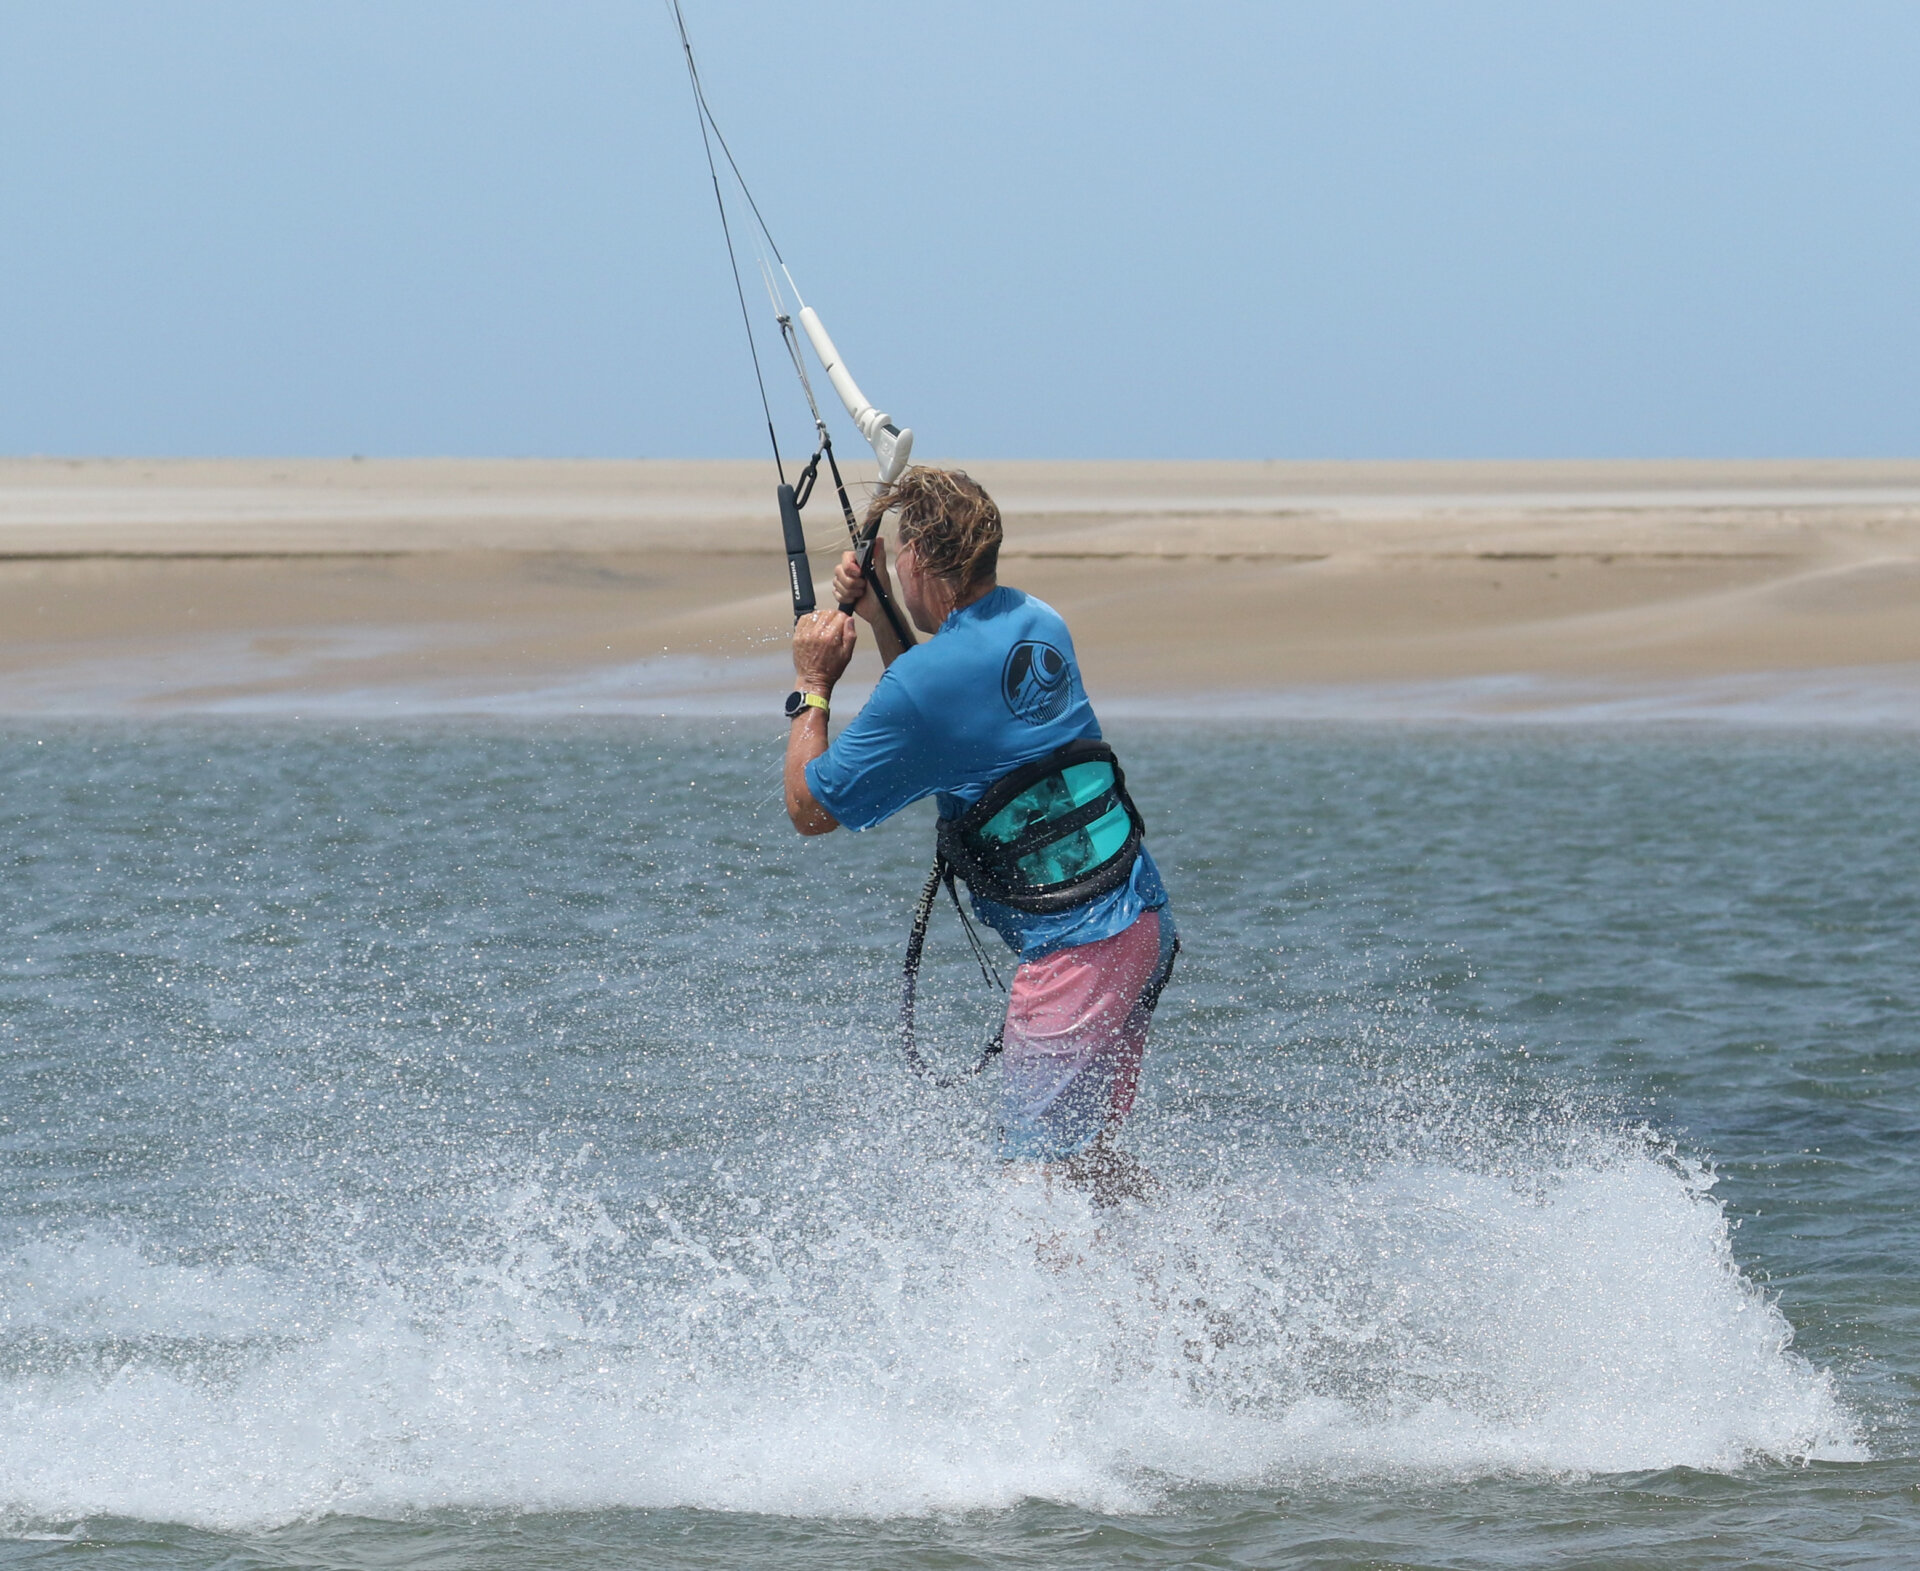
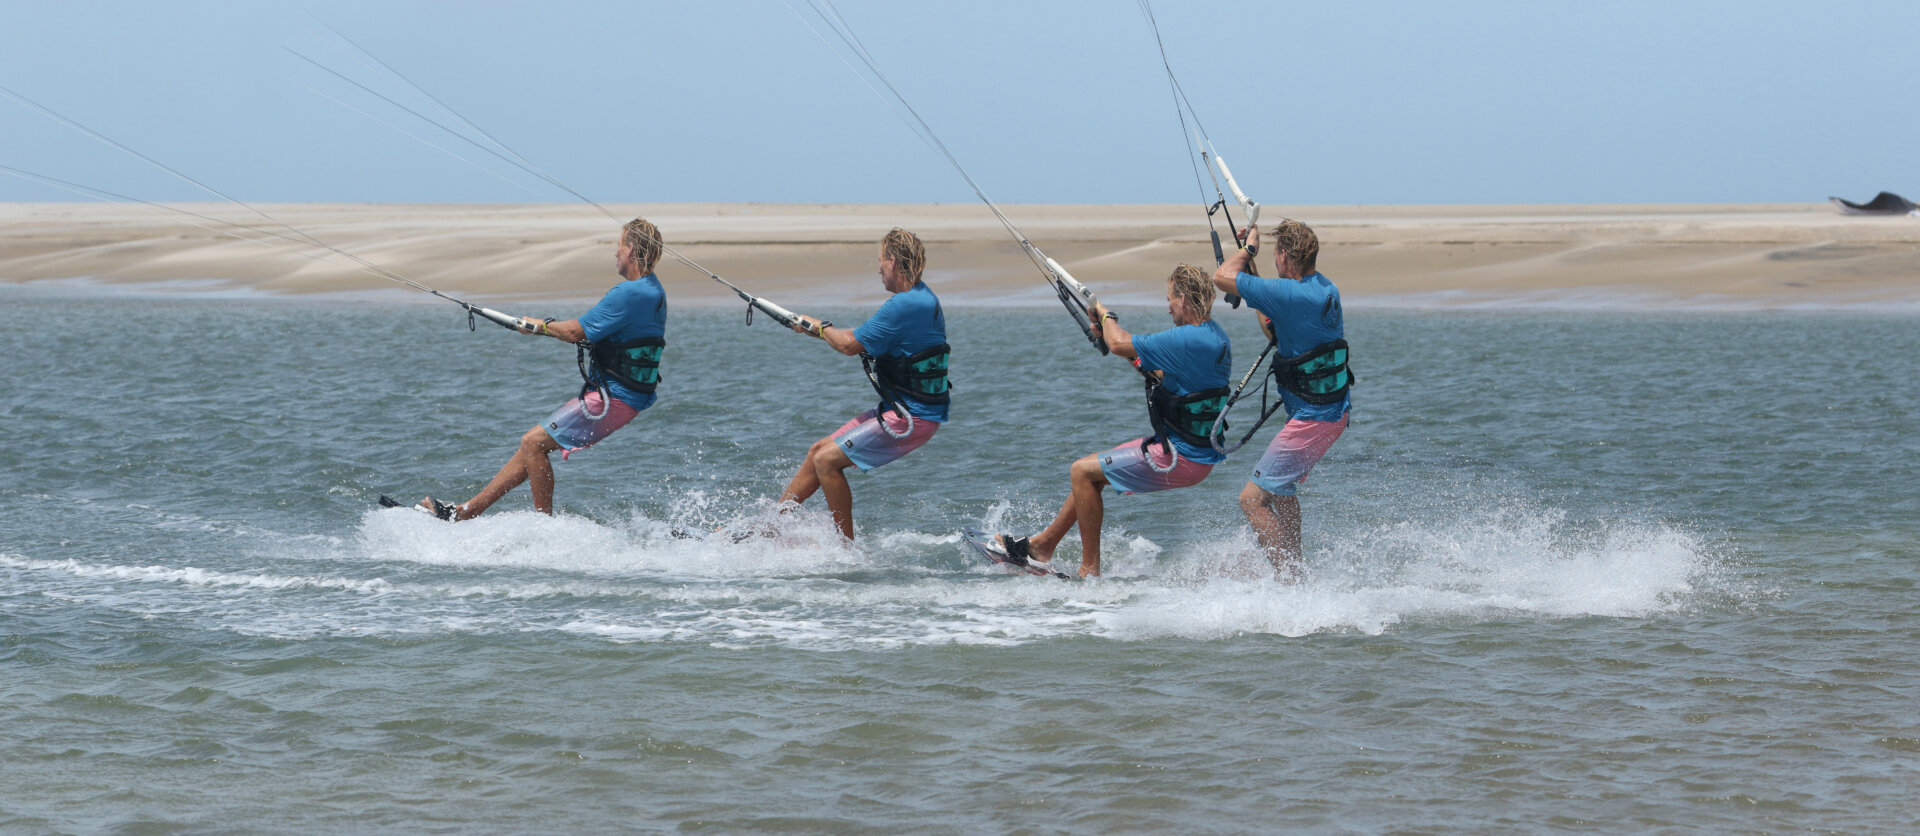
Stand Up Pic G.
You’re on a twin tip, so as you grind to a halt, it’s only a matter of milliseconds before you sink. Every cell in your body will suggest that it’s wiser to stay small, but you want to stand tall and proud. The reason is that you can aggressively dive the kite if you’re standing. If you stay trim, you’ll support yourself on the bar and stall the kite, so you won’t be able to wring any power out of it. Christian’s got his bar on the sweet spot and is diving his kite meaningfully while reaching for the bar with his free hand.
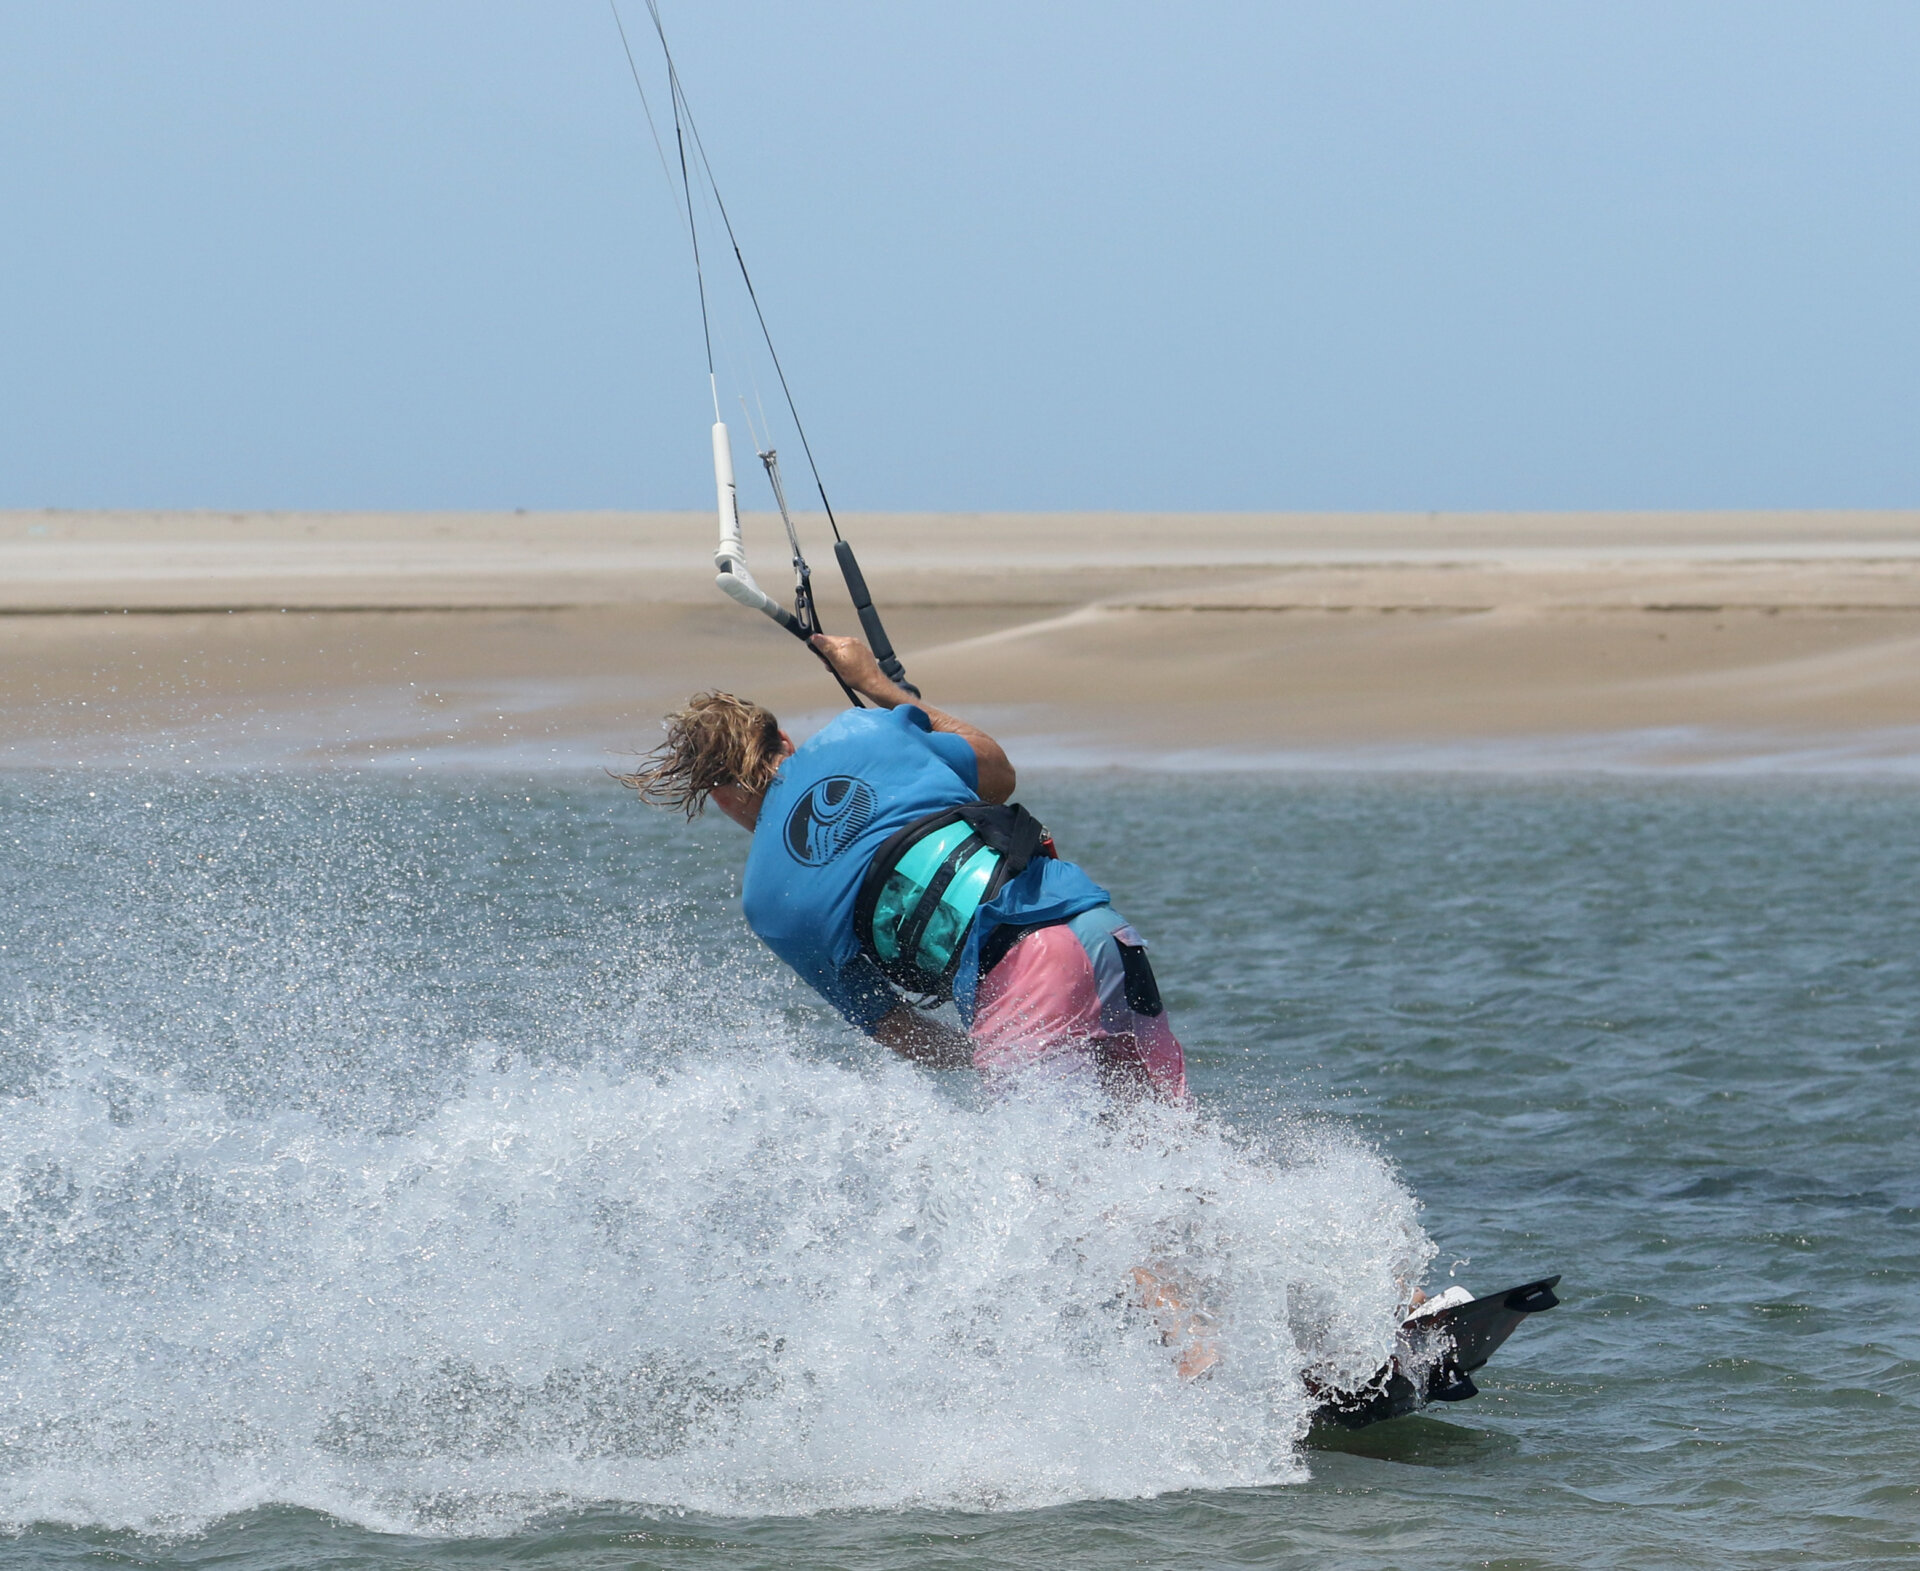
Claim It Pic H.
With your kite diving hard, you need to get ready for the pull. Drop your weight back over your rear foot, which will enable you to keep the nose of your board up and drive it off the wind as the power comes on. As soon as you start moving, get back on your edge, and once you’re comfy, you can untwist your lines.
Top Tips
We can’t emphasise enough how much your toe-toe-sieving position impacts this move. It’s worth practising your open stance, which will also improve your toe side if it needs polishing. Everything happens very quickly, so you’ll likely carve too late at first, having missed the cue from your kite. The more you practice, the better the timing and the more feel you’ll have for the kite’s position.


Now, look at sequence 1 for the entry and sequence 2 for the exit, and then watch the video to see how it plays out in real-time.
Common Problems
Suppose you can’t drop your weight to carve. Either your sweet spot is too far away, or you’ve drifted the kite too quickly. You must minimise lift, so be gentle and give yourself room to push out.
If you can’t carve, you’ve moved the kite too far, or rather than carving on your edge, you’ve broken at the waist and lost your edge. Once again, be gentle with the kite, and keep your knees, hips and shoulders aligned as you drop.
Suppose the tail is skidding out as you carve. Too much weight on the front foot is the usual culprit here and, ironically, results from a good toe side. Allow your weight to drop slightly back as you sink your hand. The other possibility is that you’re turning your shoulders into the carve too much. This will encourage your legs to push across the board rather than drive it forward, so hold an open stance.
Keystones
- Good solid open toeside with some speed
- Drift the kite slowly to 12 and feather bar out
- Plant hand and carve hard upwind; keep drifting
- Push against your front hand to stand up
- Dive hard from the sweet spot

This technique article was in Issue 109 of IKSURFMAG.
Related


By Christian and Karine
Christian and Karine have been working together as a coaching team, running improver to advanced kitesurfing clinics since 2003.
