
Back Roll
Technique / Beginner

The beautiful back roll, admired and feared in equal measure, a coming-of-age move, your first rotation. Previously, it was also known as the back loop (before kite loops came about), and although our intention is not to discuss nomenclature, for learning’s sake, there are three ideas that we’d like to introduce you to for this move.
Firstly, let us start by dropping the “back”, as there’s nothing back about it! You’ll move forward to take off, look over your front shoulder to help you rotate, and land facing forward. Let’s rather think of it as a vertical 360 spin under your kite, nothing inverted, and no flipping intended.
Secondly, we’re going to take you through this as a small jump. Yes, you’ll give the kite a little send so it lifts and floats you. We’re not talking about a popped “back” roll, which is considerably harder and can encourage you to spin into all sorts of unpleasant mistakes, which we’ll look at in a future article. The little jump variant that you’re about to learn means that you’ll be in a better position to control your kite, you’ll be able to rotate slowly and still make it around, and most of all, you’ll be using a skill you already have, jumping.
Thirdly, if there is one word to describe what you’ll be doing, it’s extending. We say this as the opposite is all too common when learning this. You want to be extending up into your rotation so that you can rotate around your lines. It’s all too easy to succumb to the temptation of curling up into a ball and rolling back, but we want extending forwards.
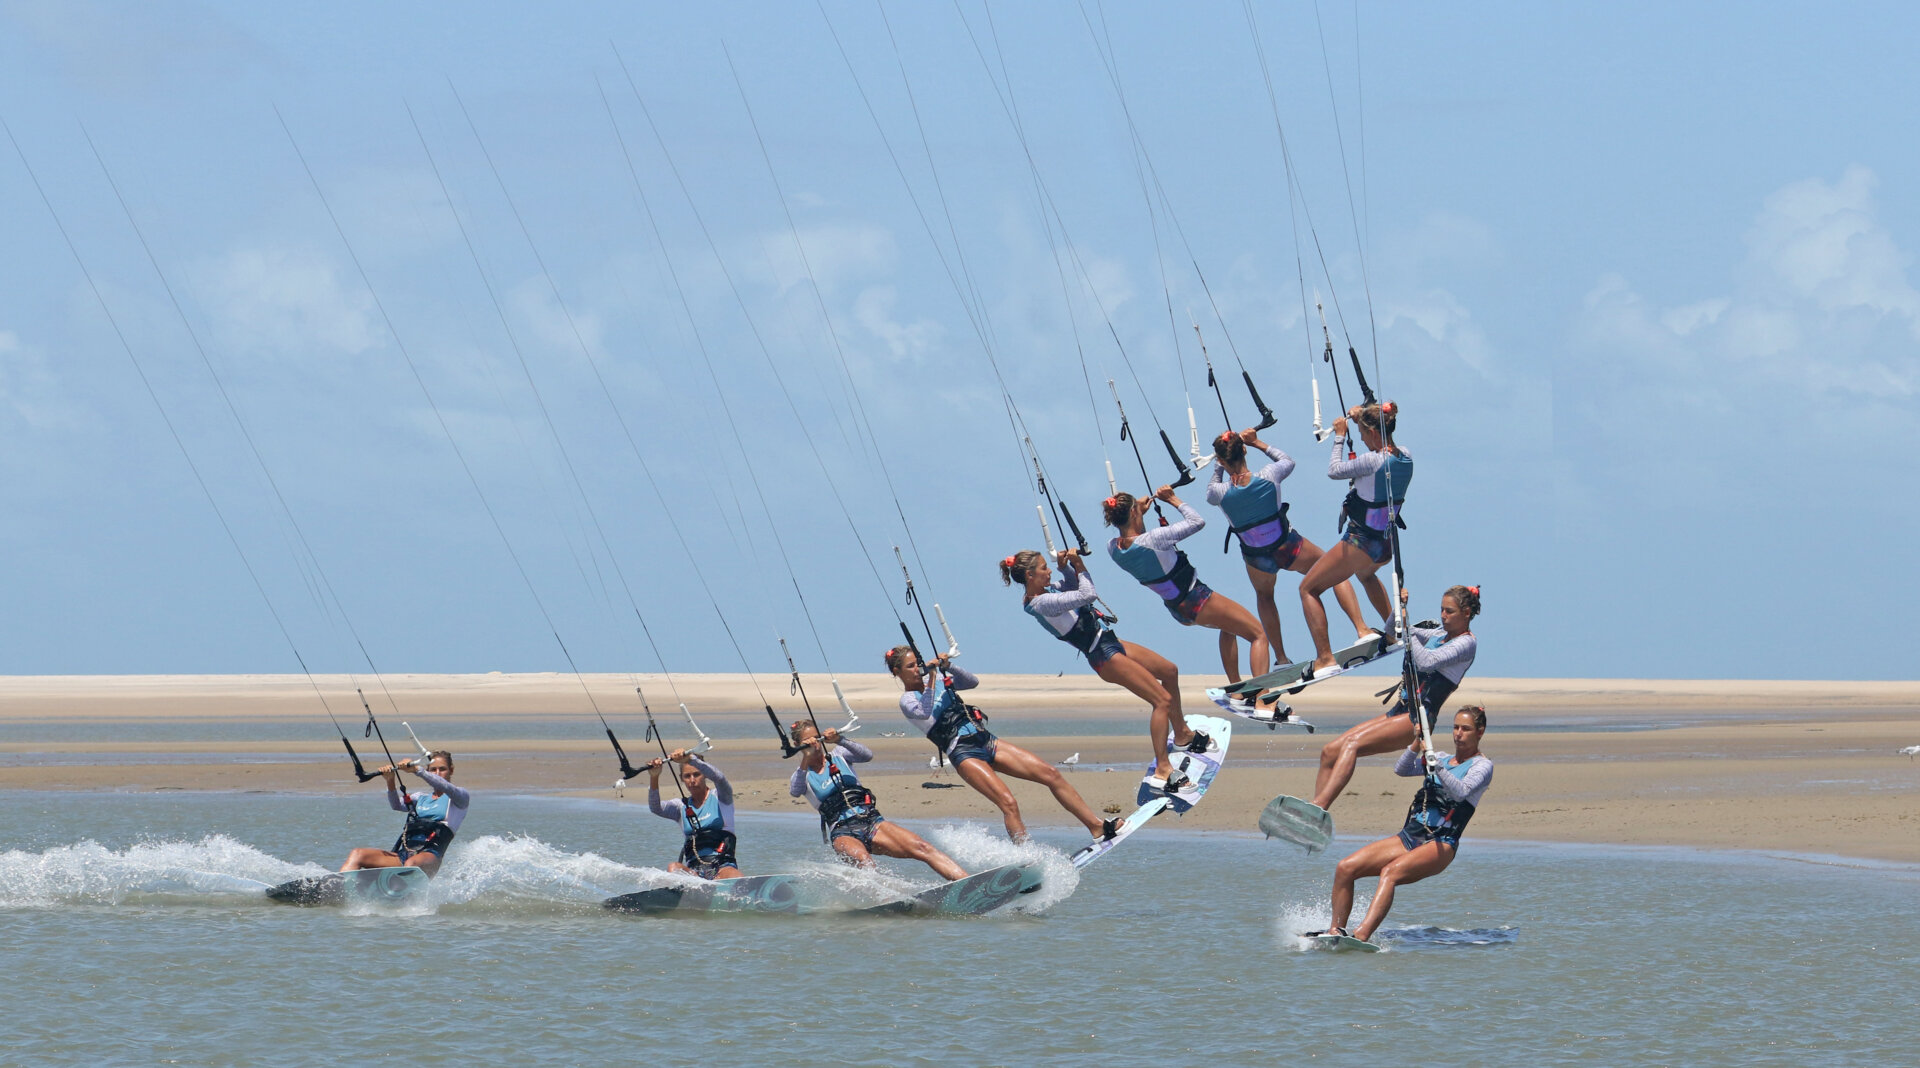
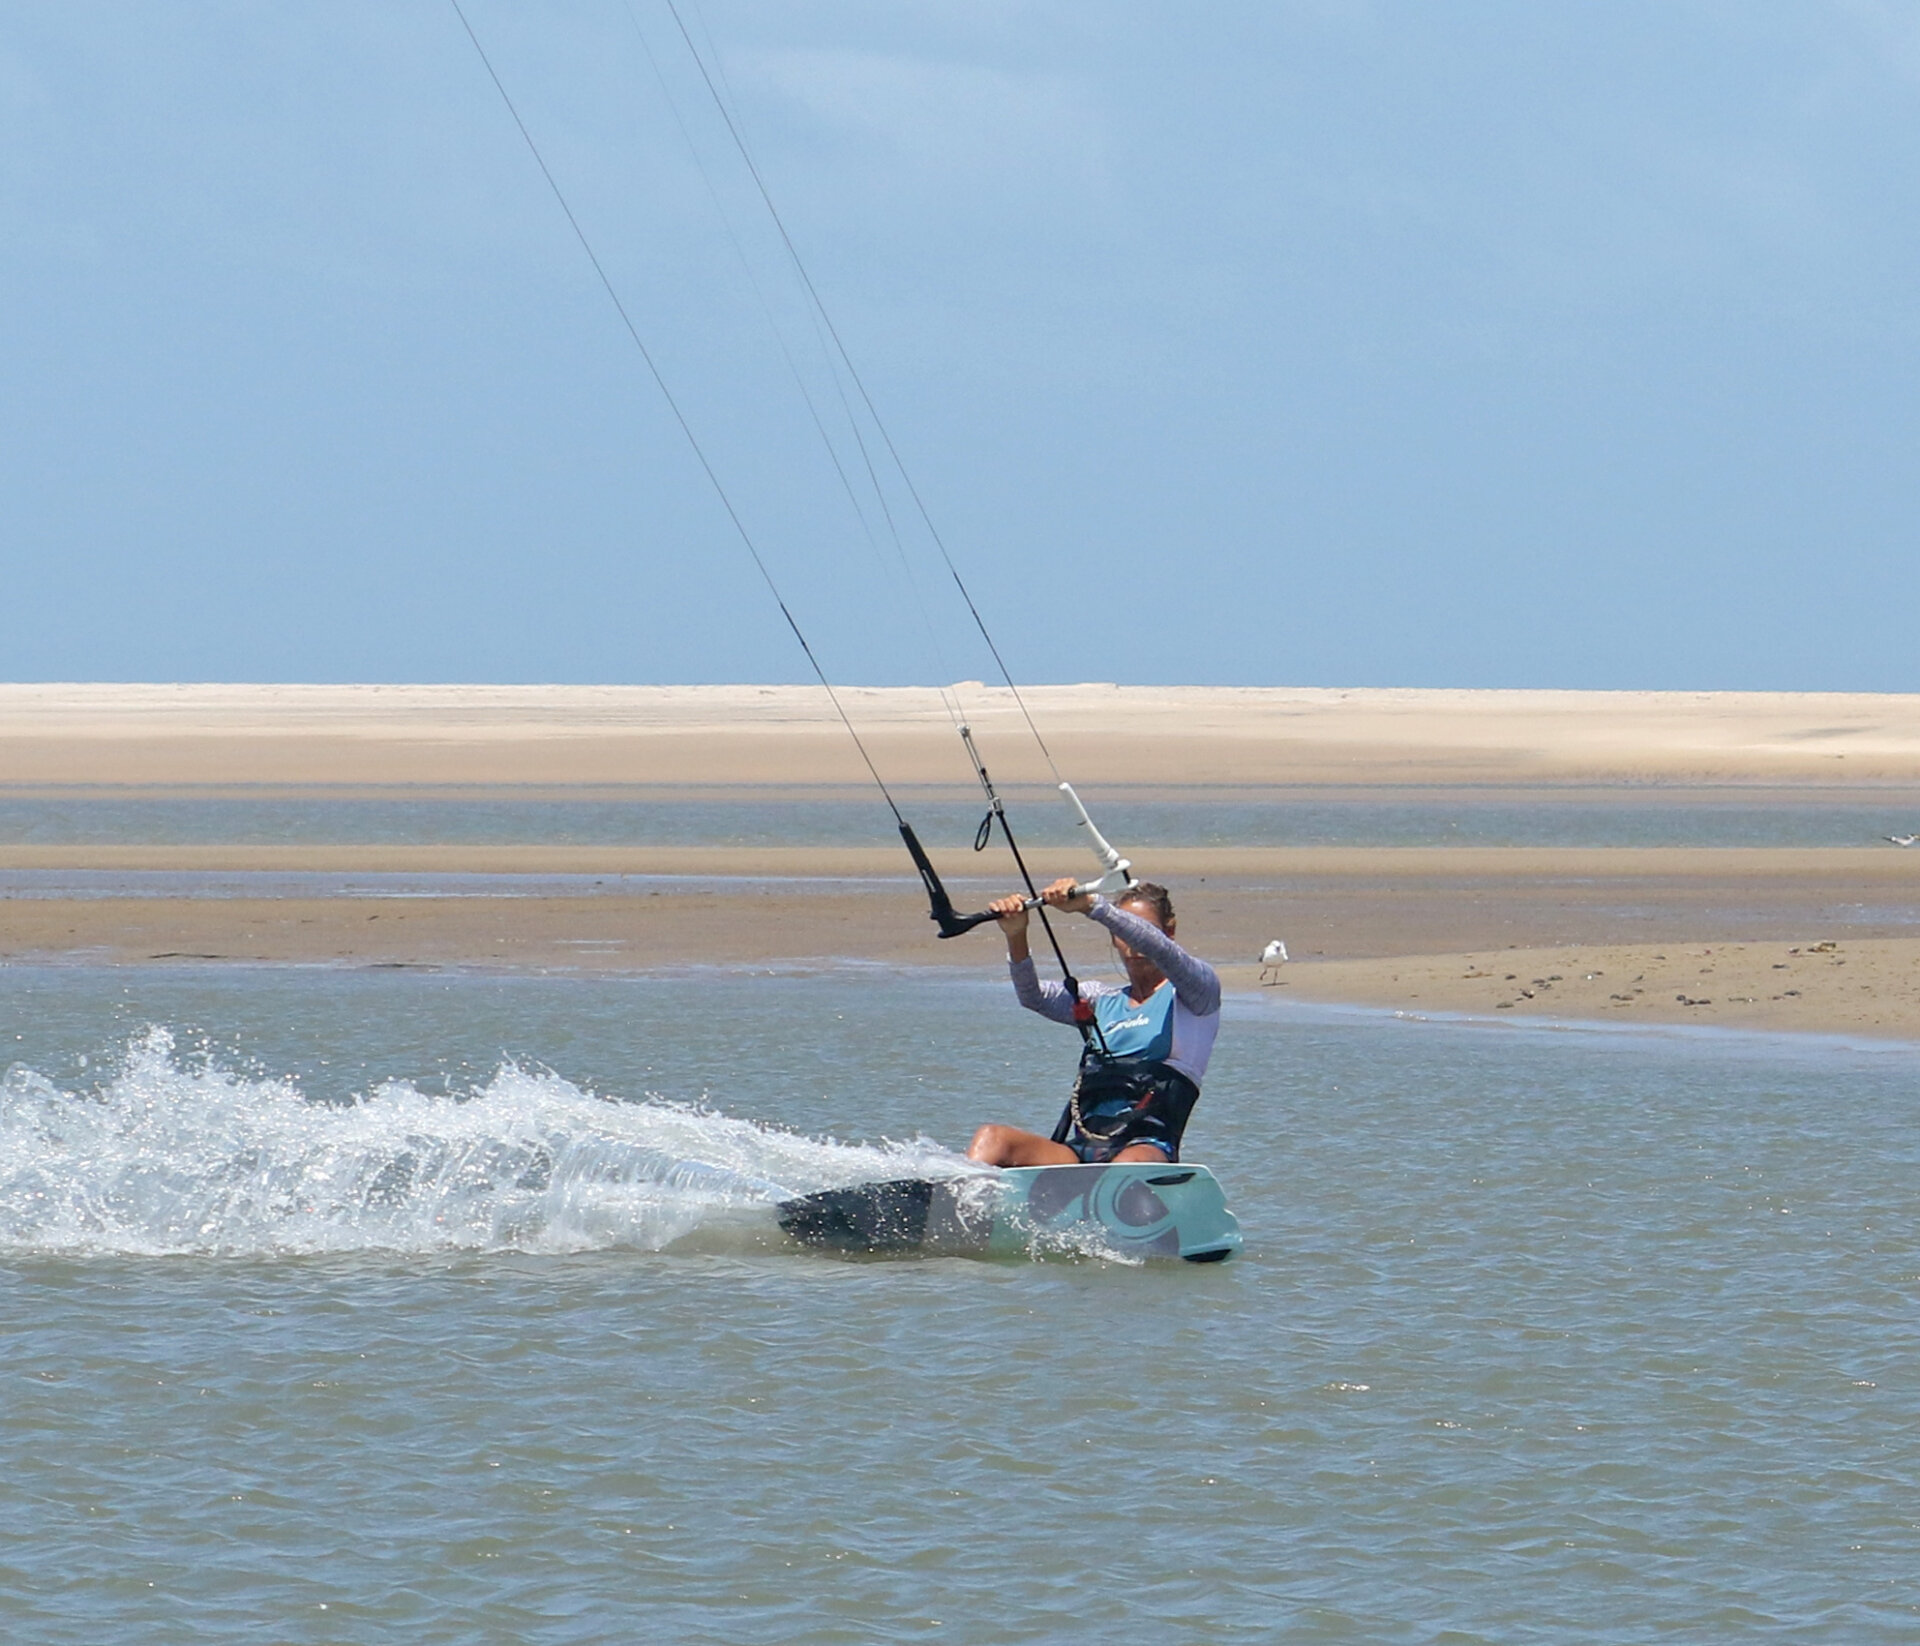
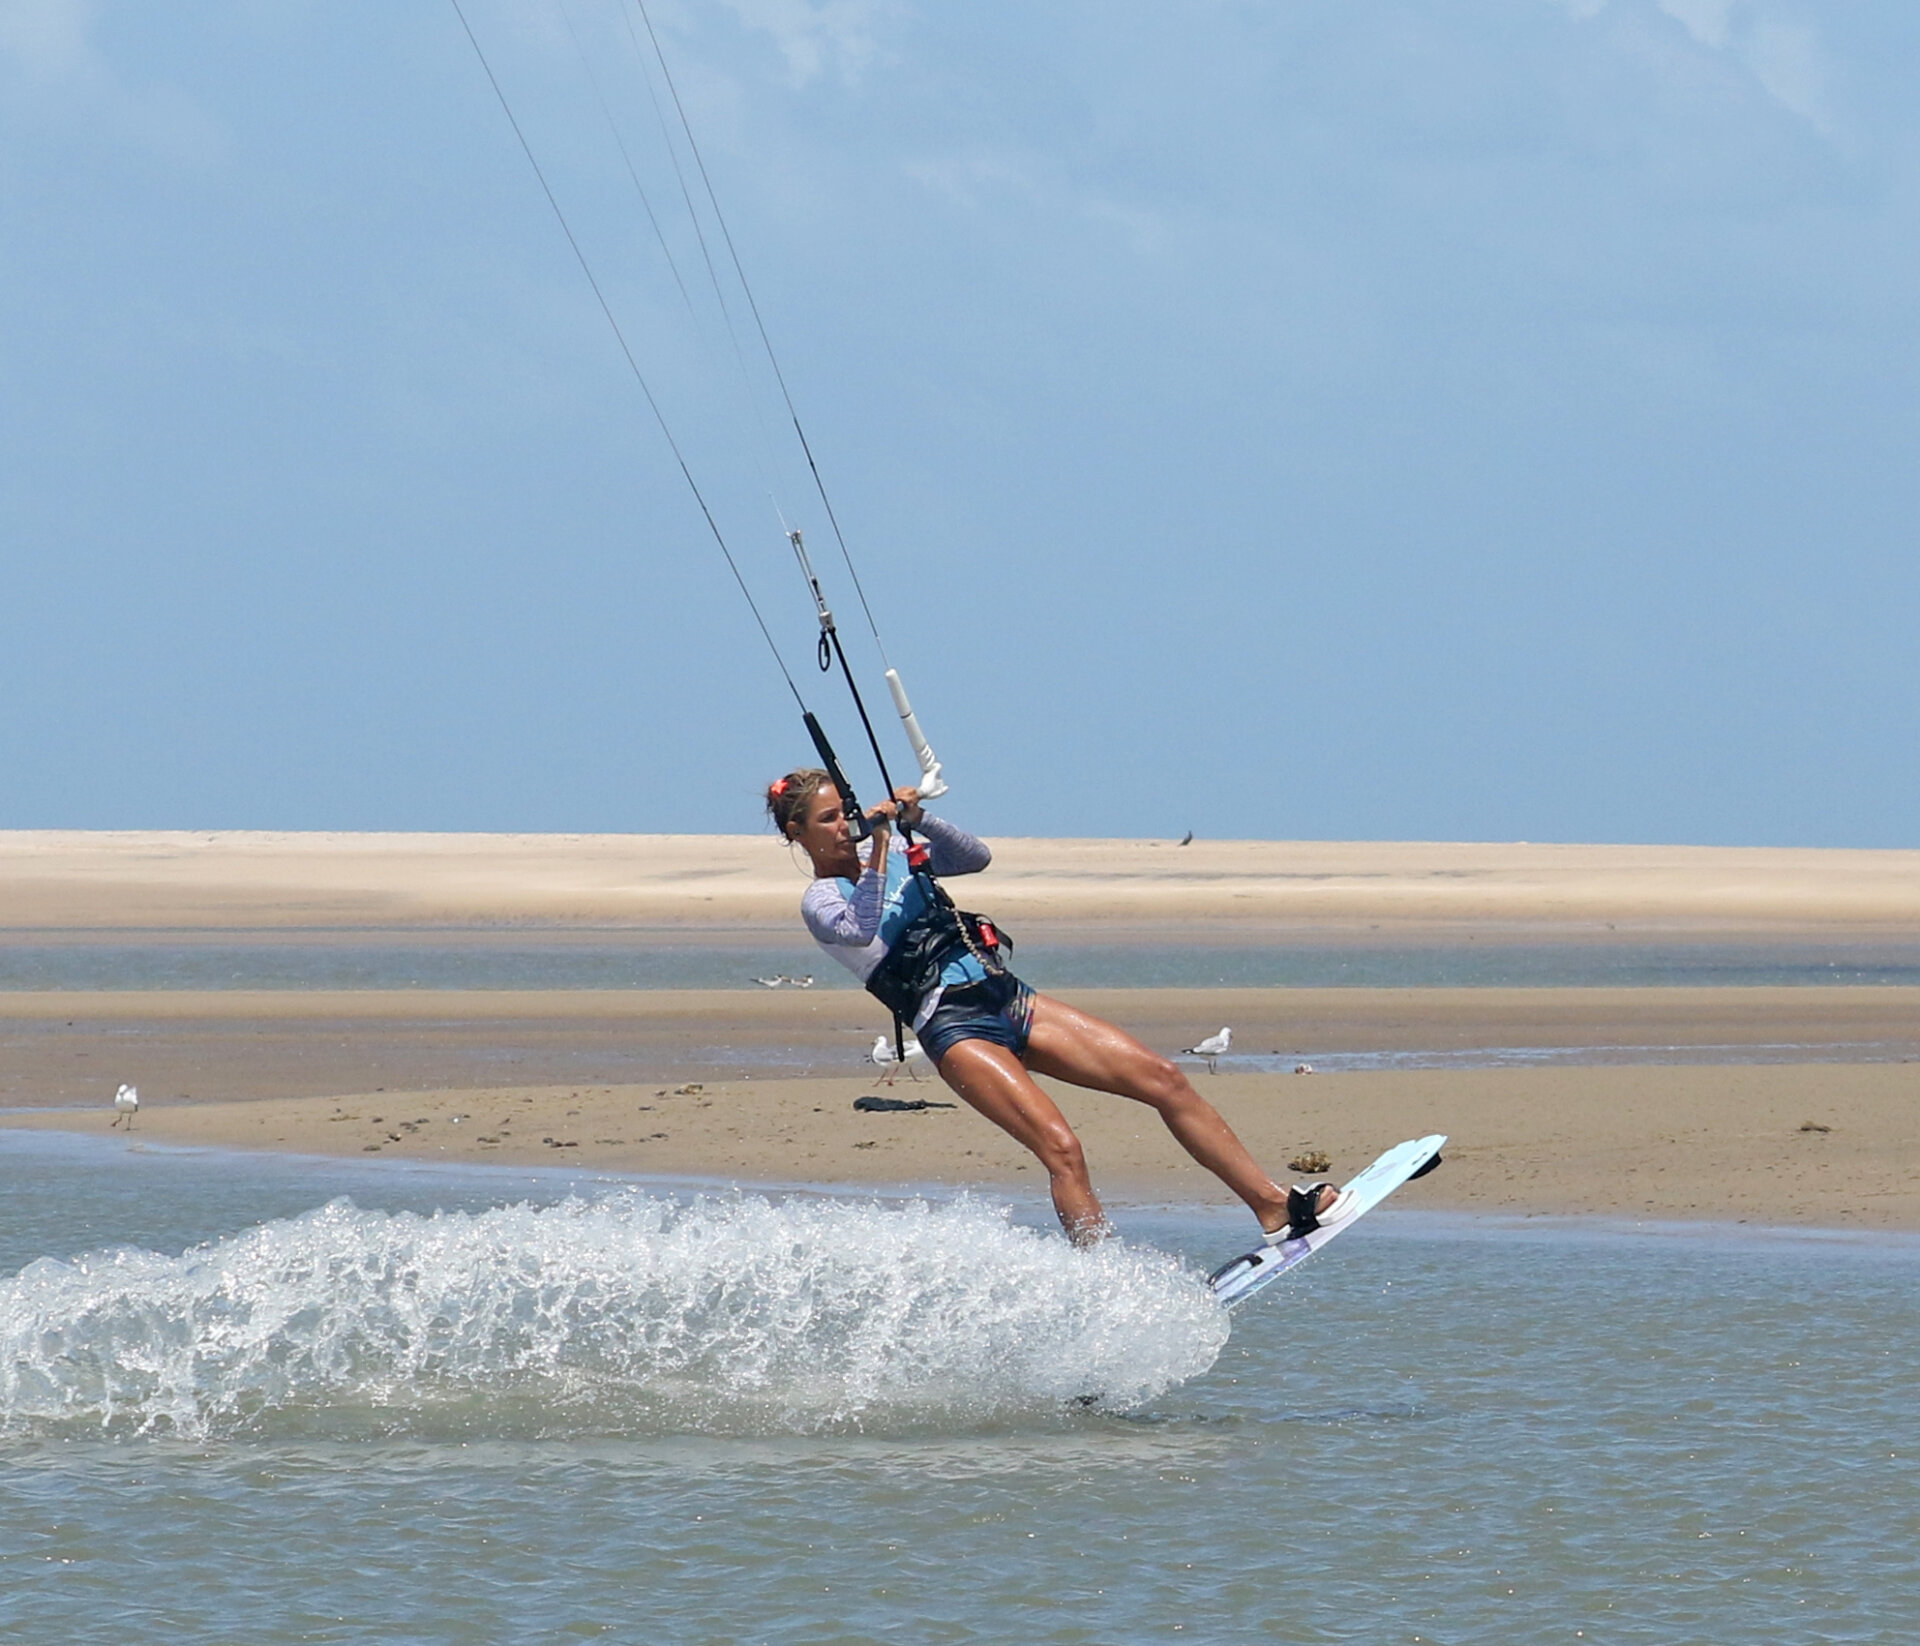
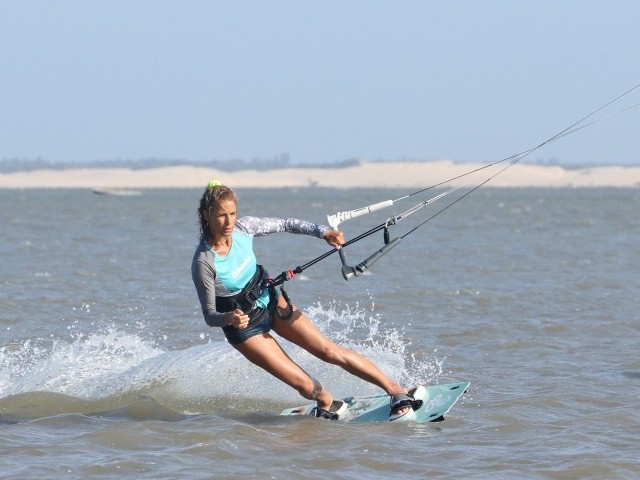
Understanding which direction you rotate is very important. The best way to think of it is that you’ll be carving up into the wind and continuing around from there. If you quickly look at the sequence, you can see Karine jumping on port tack, riding from right to left. She’s taking off, turning up into the wind and carrying on around until she can look downwind again.
OK, let’s have a butcher's at some key moments and see how you need to tackle them.

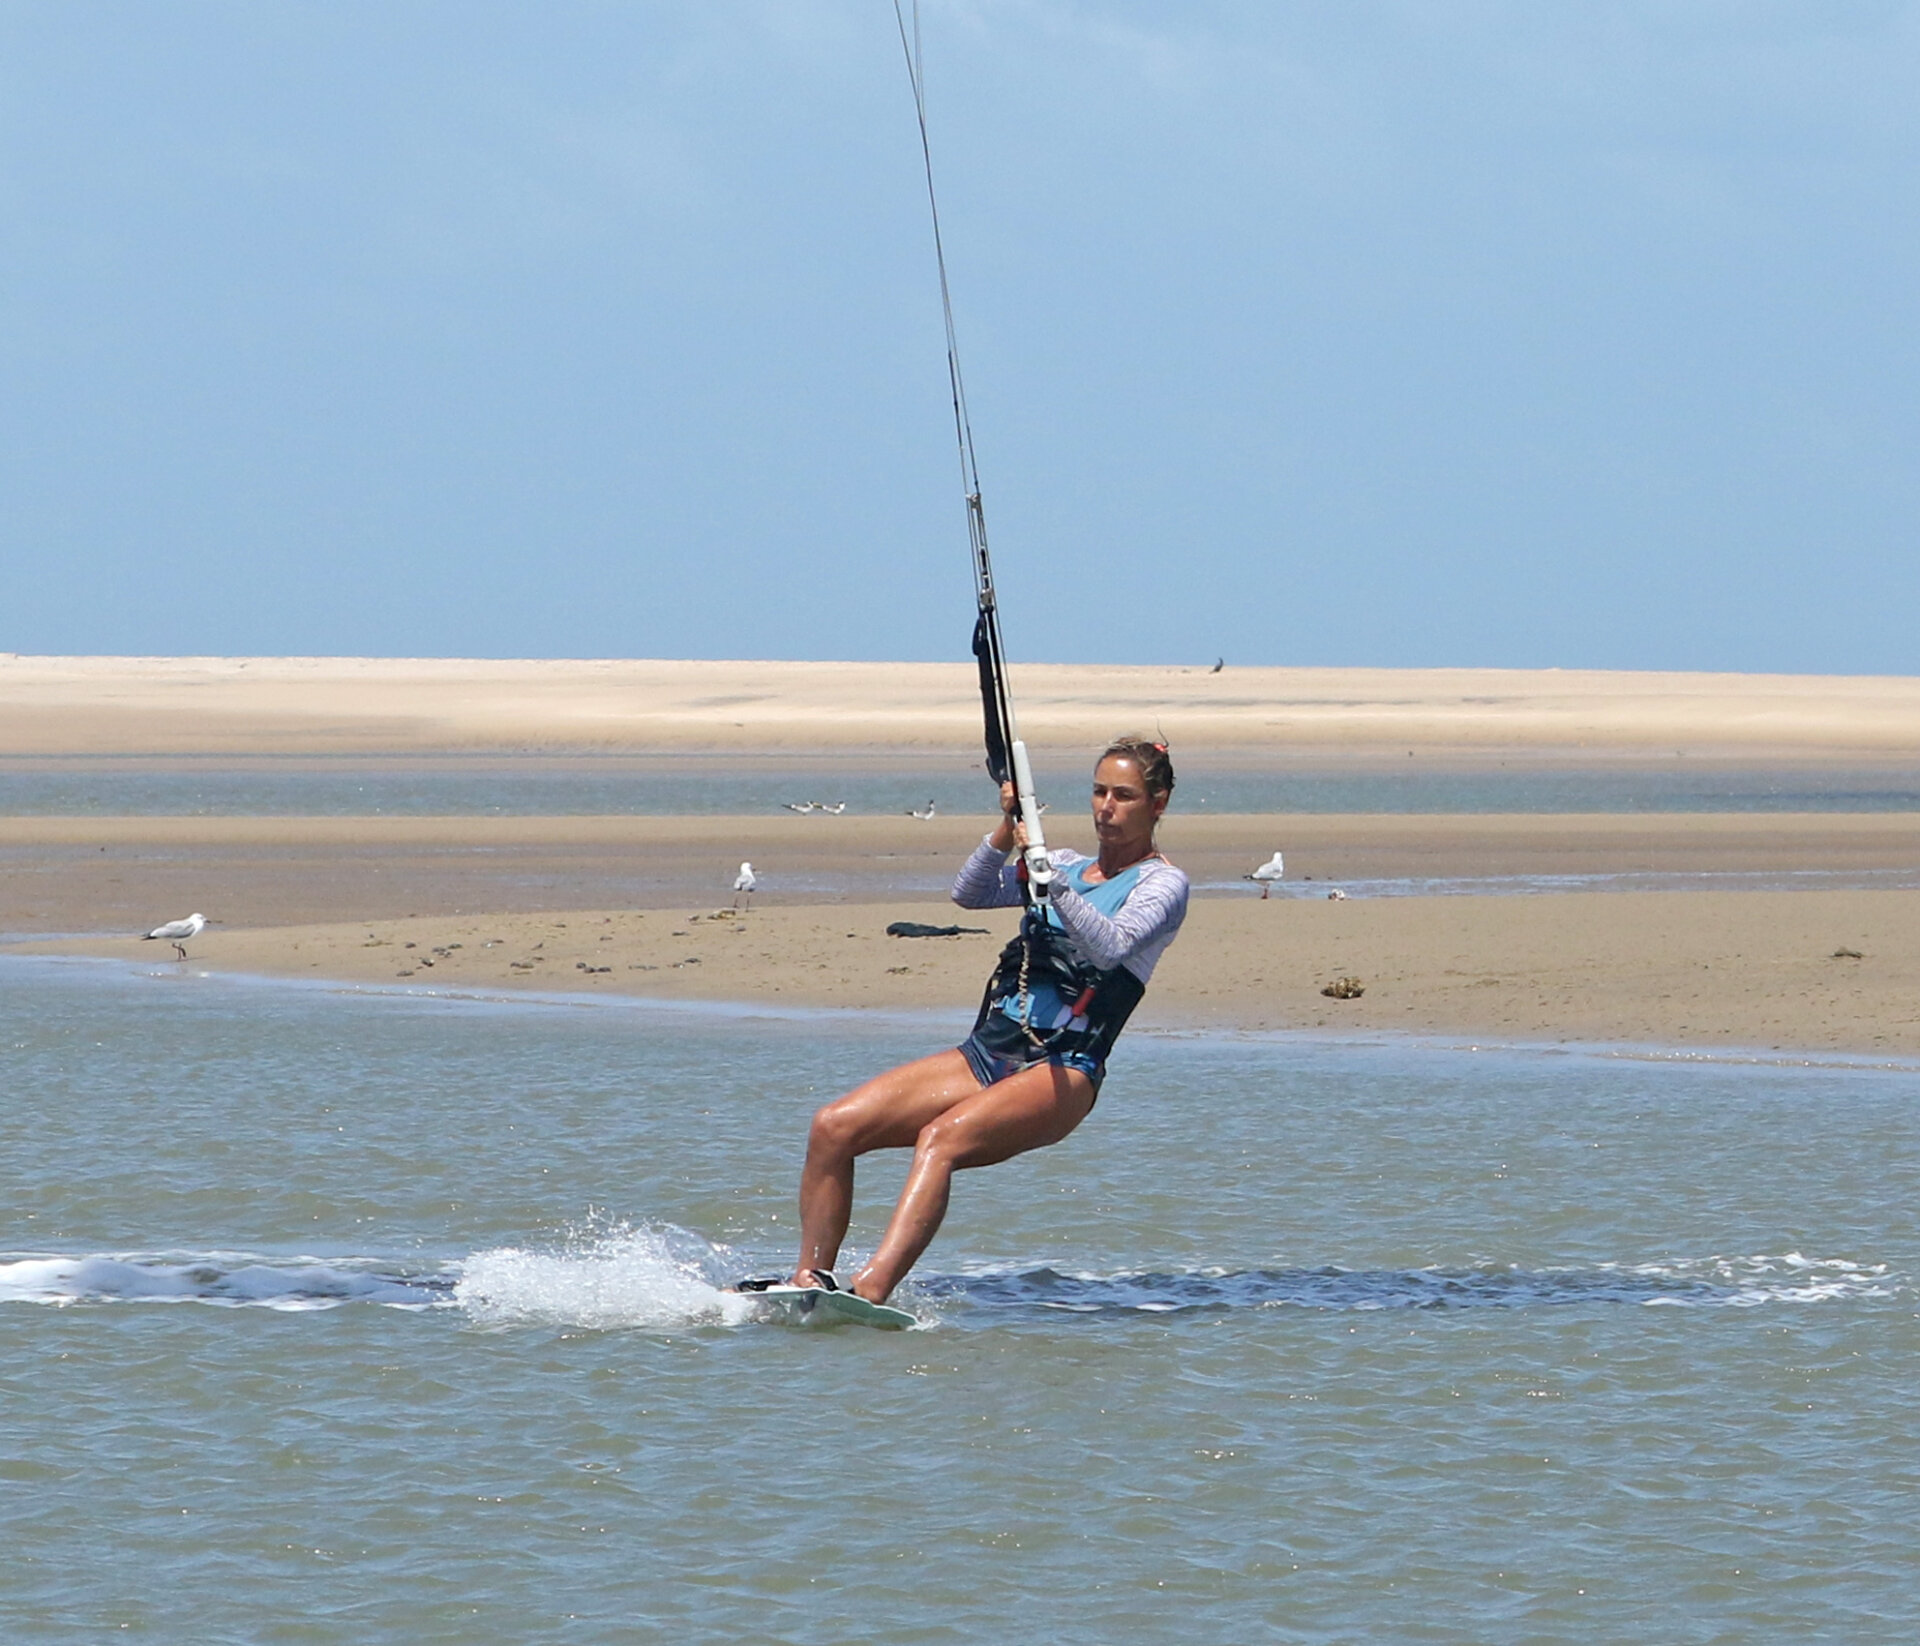
Approach Pic A.
For your first attempts, you’re aiming for a small jump; one metre is plenty. It’s all about confidence, so sending yourself into the stratosphere is not on the cards. As such your approach should be comfortable. Start off with your kite at 1 or 11 o’clock. This way you can still edge against it, any higher and you can’t. Speed-wise, you need to be moving but don’t want to be blatting full tilt. You need some power to ride upwind and get airborne, but please don’t be hanging on. Position your hands on either side of your centre line. They don’t need to be butting up against it as this will make it hard to steer the kite, try a thumbs length out. And finally, make sure that the coast is clear and that there is enough water in case it doesn’t quite go according to plan. Karine has a good edge; she’s riding comfortably upwind, her hands are centred, and her kite is at 11 o’clock. The coast is clear, and the water is deep, she’s ready.

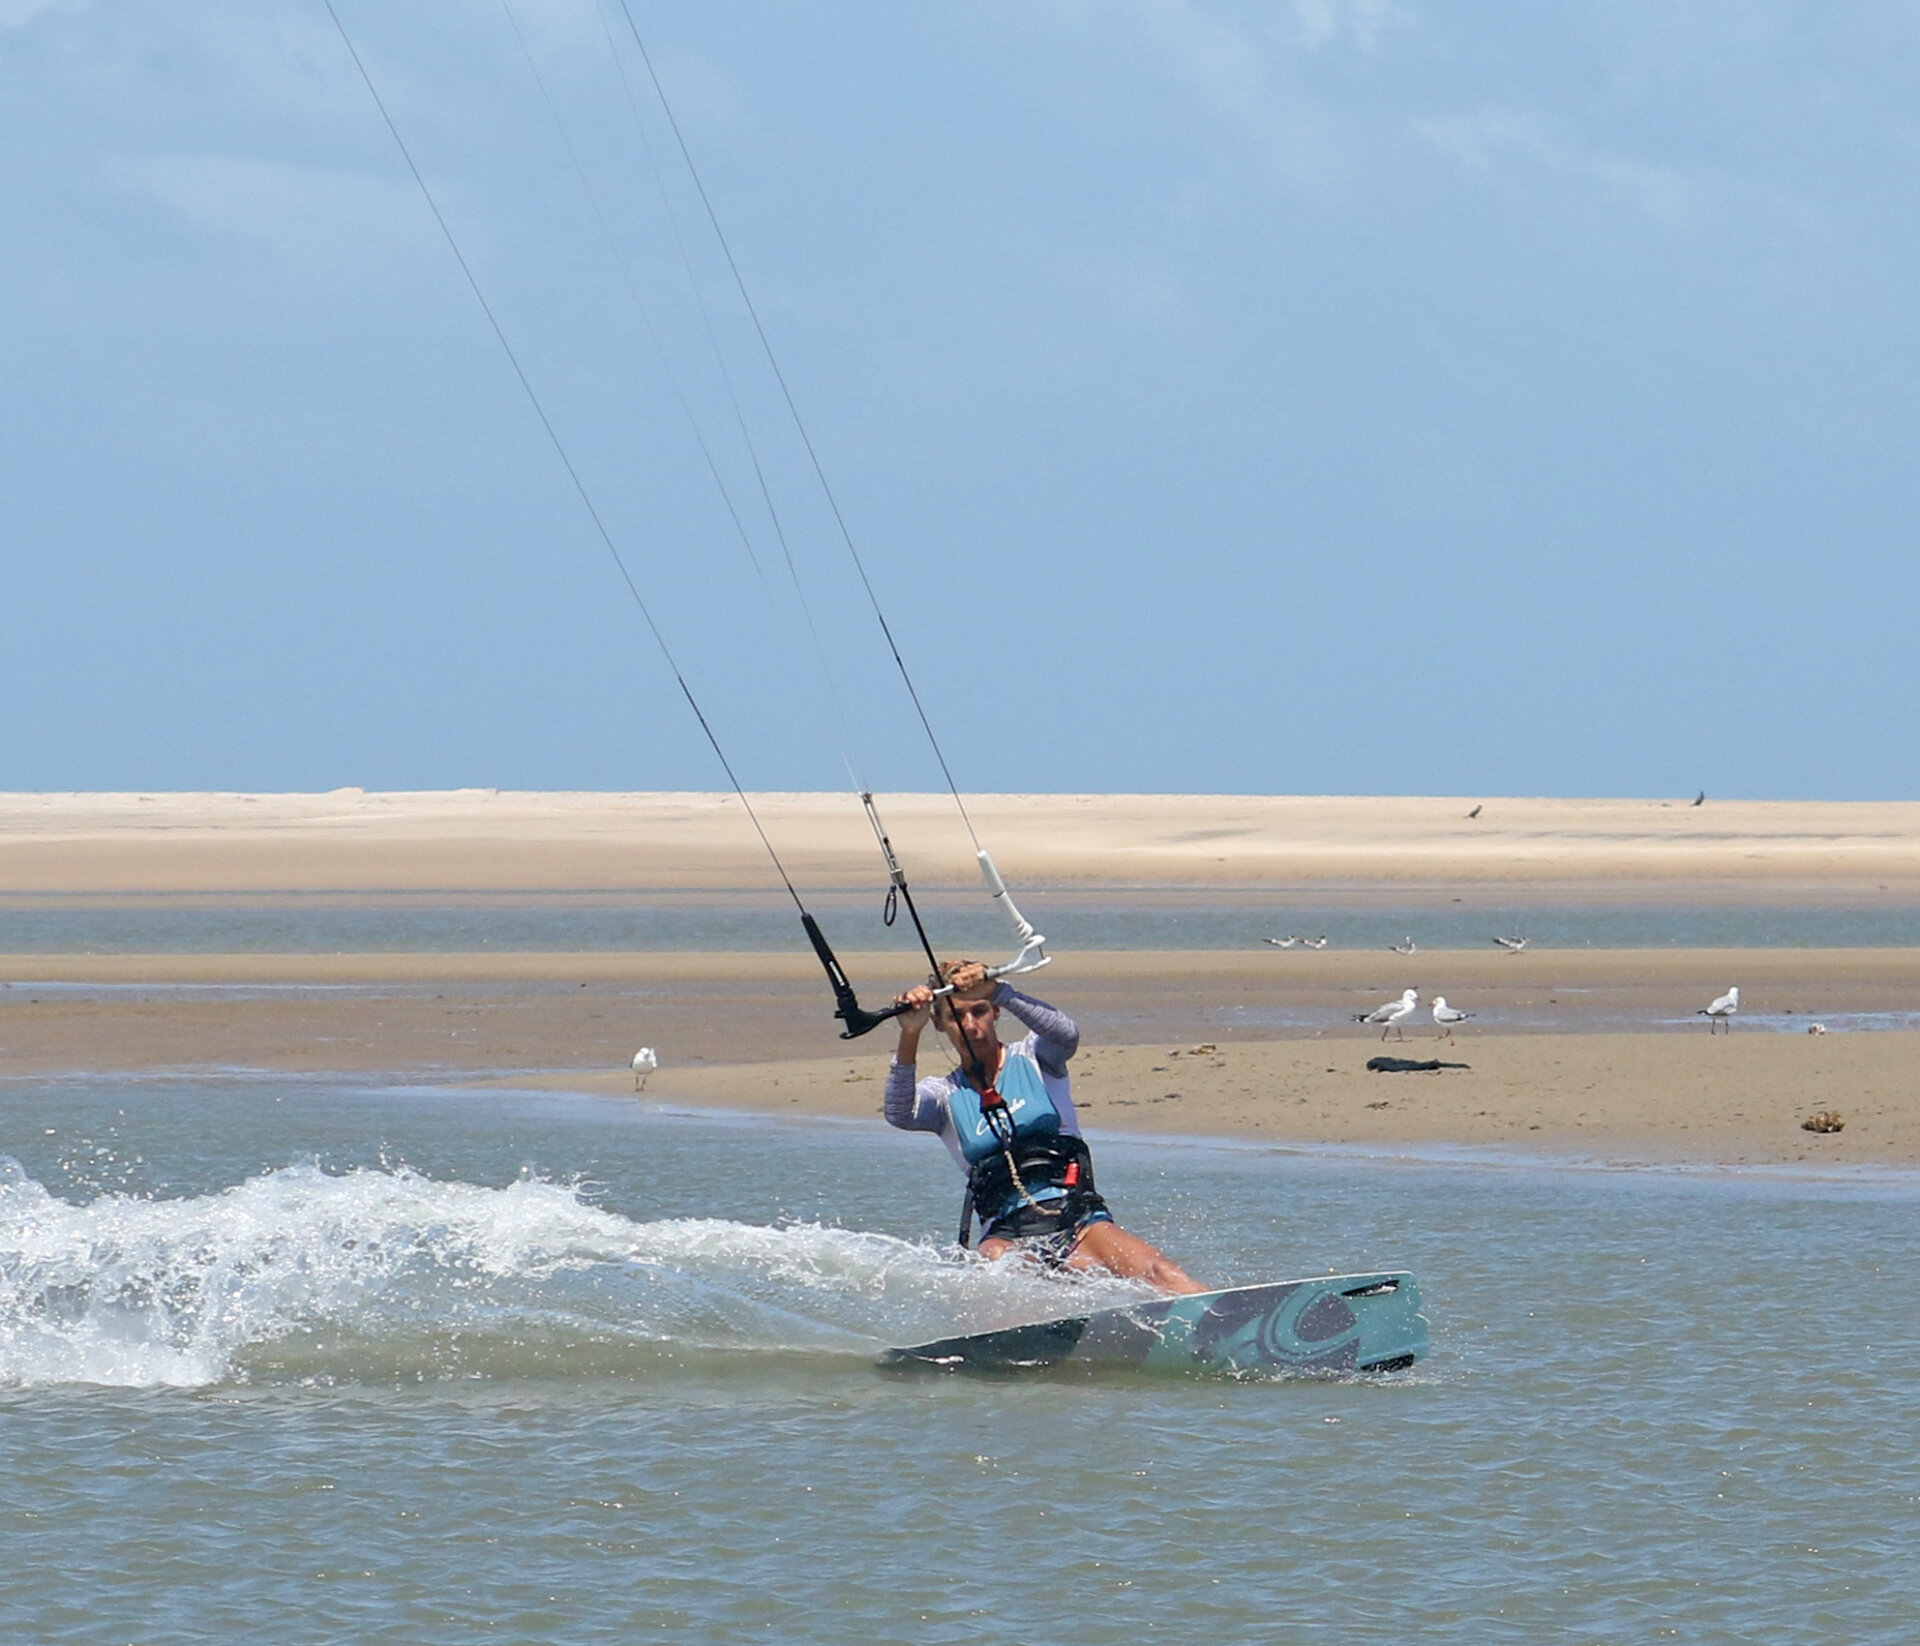
Short Sharp Send Pic B.
The key to any intentional small jump is a short, sharp send. You still need to move the kite so that it generates lift, but you don’t want to send it too far. Theoretically, you’re trying to get it to around 12 or a fraction behind. If you move it too slowly, you won’t get any lift, and it’ll be hard to hold your edge. You can see that Karine has steered her bar back to move the kite up, but it won’t be for long…
Level & Out Pic C.
Levelling your bar is a crucial moment in your rotation. It’s something you need to do before take-off. While you’re still on the water and riding, you know what and where the level is. You won't have a Scooby once you lift, rotate, and who knows what? The purpose of levelling is twofold. Firstly, it’s to stop the kite moving, and secondly, it’s to hold it there. If you can keep your kite at or around 12 o’clock as you rotate, you’ll have lift and support with very little movement, and it’ll enable you to rotate vertically around your lines under the kite. This is what you want. As per any jump, you also need to feather the bar out to follow the sweet spot as the kite moves up to keep your edge while still feeling some tension on your lines. Karine is still edging, and as the kite lifts, she eases the bar out so that her kite can trace the edge of the window as it climbs to 12. Once she feels it start to lift, she levels the bar to stop her kite from moving any further.
Carve Pic D.
You need to carve the board further upwind to initiate your back roll. You can only do this if you have feathered your bar out. If you pull in, there is no way to turn up whilst edging. Turn your shoulders and trunk whilst driving against your edge to carve the board further upwind. It’s imperative that you keep your shoulders level as you do this. This is when it’s just too easy to lean back and negatively impact the move before you’ve even taken off. The kite should now be still around 12. You can see that Karine has dropped her bum low and is driving it further upwind, breaking at the waist so that she can keep the bar out on the sweet spot as she pushes through her feet.
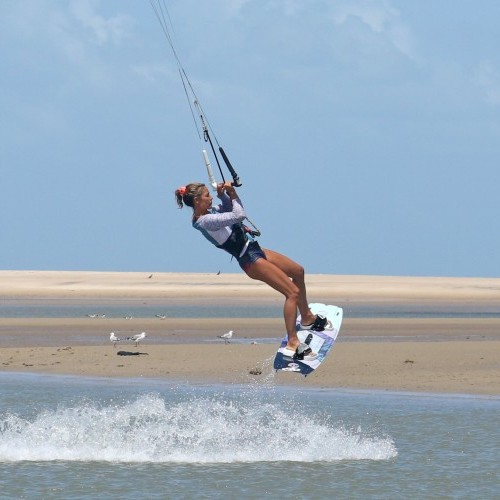
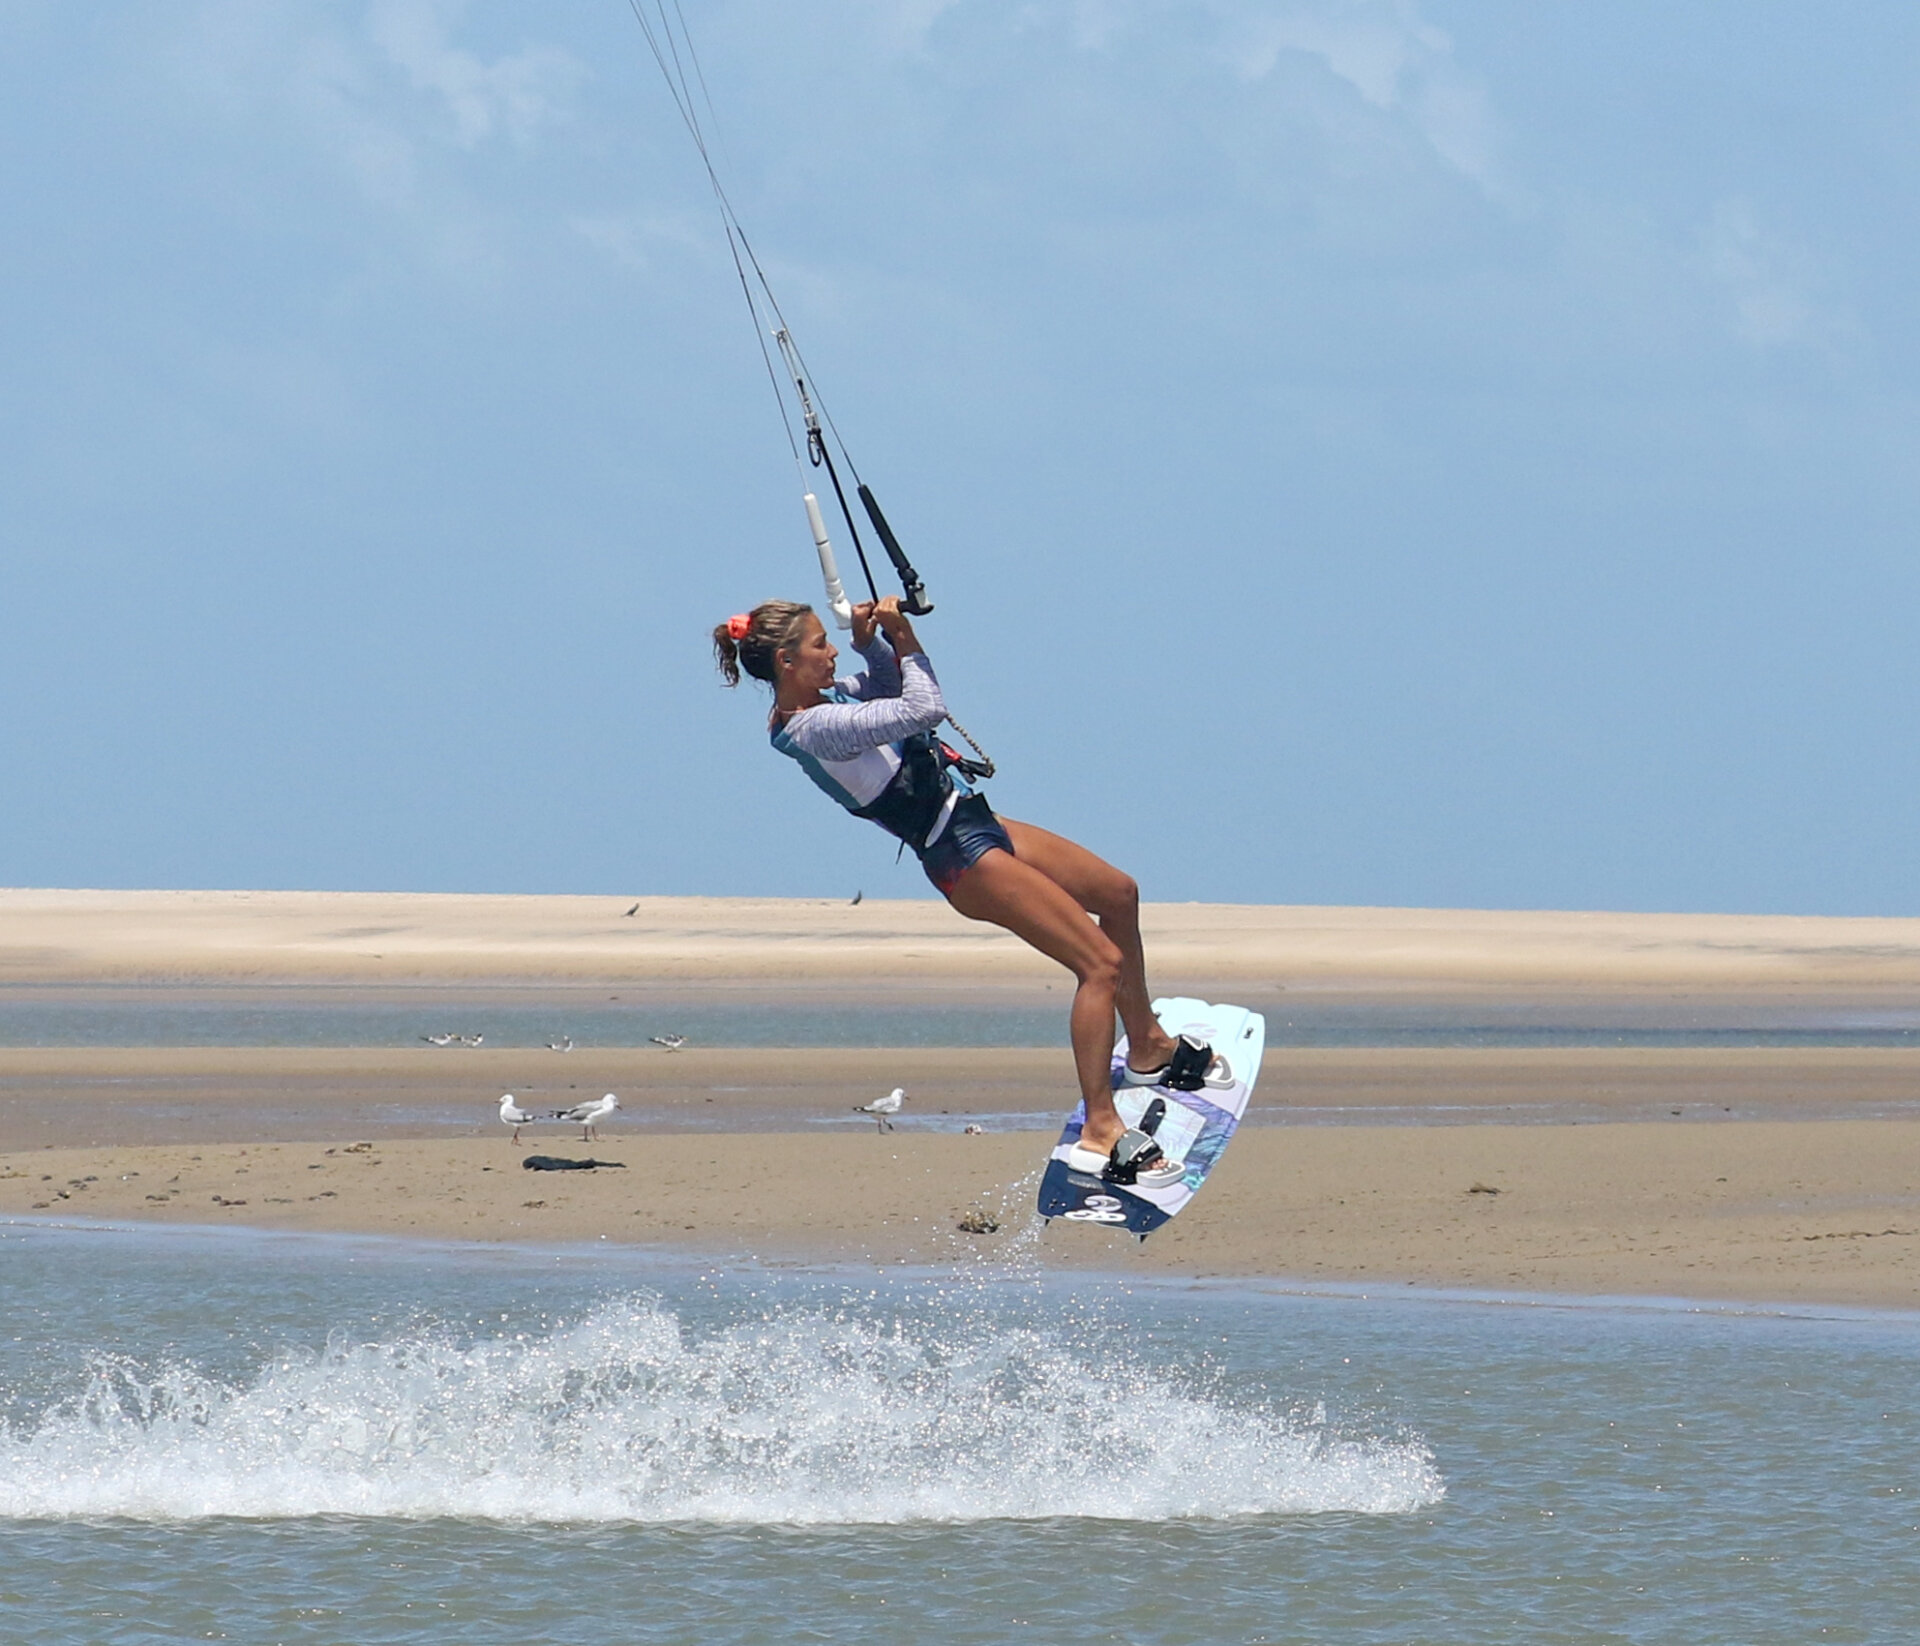
Extend and Turn Trunk Pic E.
We’re not going to let this one lie. It’s a simple picture, but so much here makes a good back roll. Firstly, the extension. To take off, extend your back leg hard to kick yourself up off the water. Use your entire body from foot to head to extend up. At the same time turn your shoulders and twist your trunk to follow on from the carve and rotate upwind. Once you’re extending it, you can pull the bar in for a lift. Looking at Karine, you can see that she hasn’t thrown her head into the rotation; she’s turned her entire body. This enables her to keep her hands in front of her whilst her legs and board come with her. We can’t overstate the importance of not turning away from the bar. Your hands and the bar should lead you around the rotation. The bar stays level.
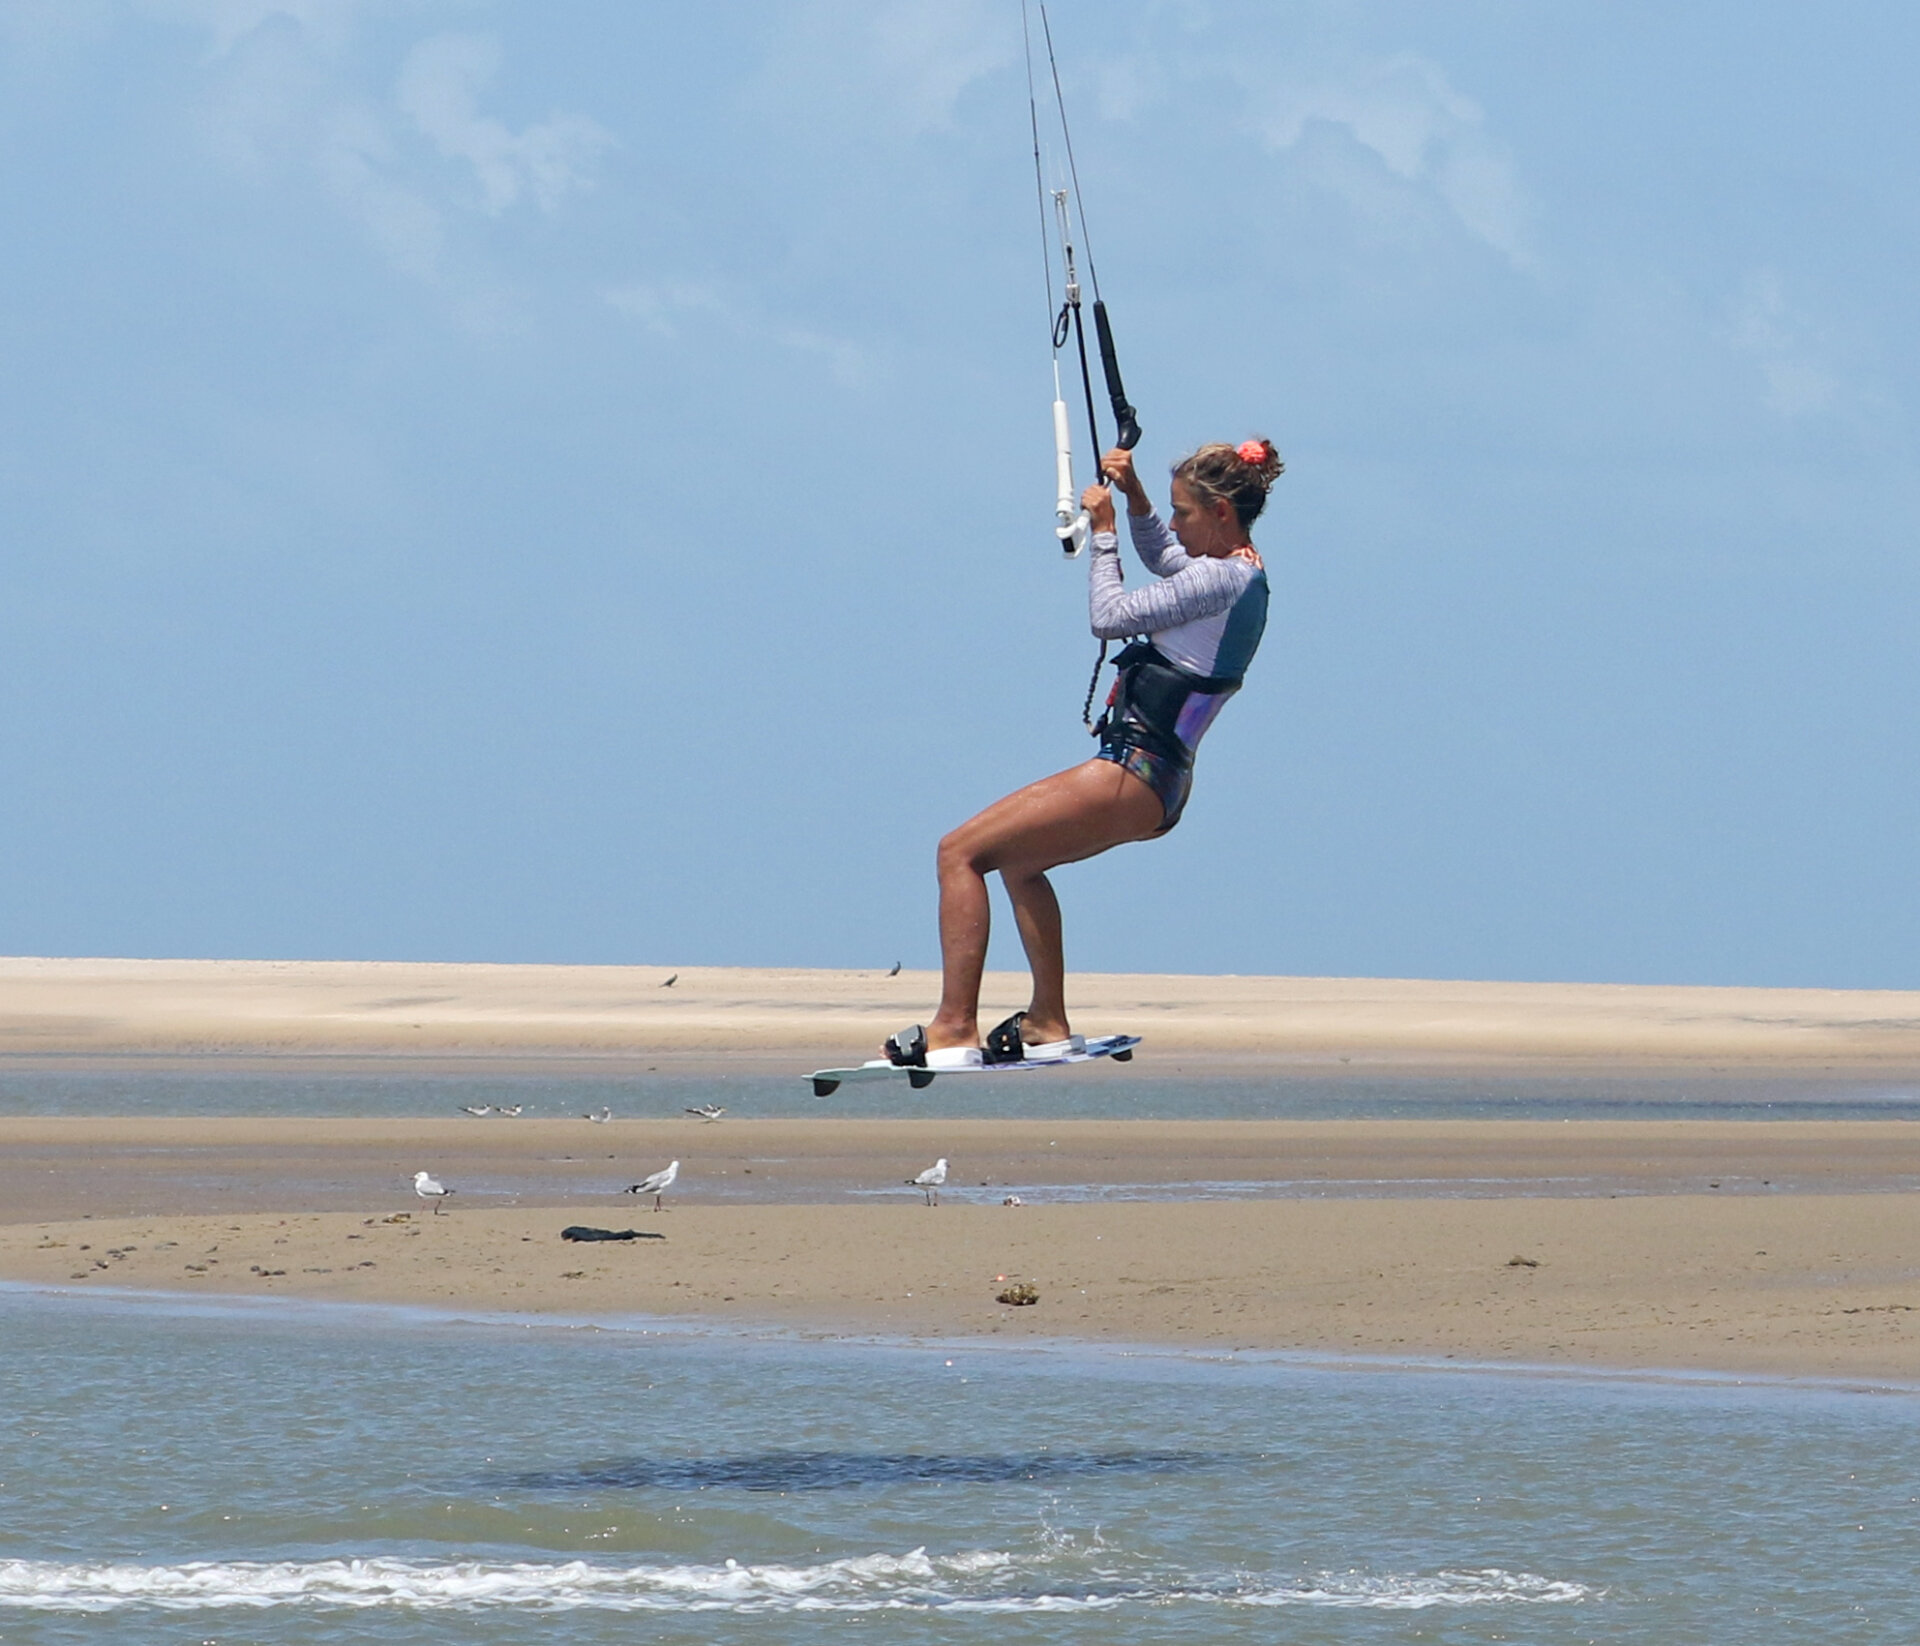
Halfway House Pic F.
You will set the rotation in motion by carving up, extending, and turning your body. It won’t be a fast spin, but this is a good thing! If all has gone well, you’ll find yourself looking upwind, over your hands and through your bar. Karine’s bar is still level; she’s kept it that way since before she took off. Her hands are level, and her shoulders are level. This all means that her kite will be above her around 12-ish. The great news is that even if you stop here, you’ll just float down facing the wrong way. There’ll be no power, no pull and no wipeout! One last thought to consider: don’t look at your kite. Tilting your head back to look up will knock you off balance and disorientate you. Keep your eyes on the horizon, bubble in the middle.
Turn Head Pig G.
As exciting as the view upwind may be, you can’t hang around for long. You need to finish your rotation. This is where your head comes in useful. Turn your head to look over your front shoulder and bring your hands and the bar with you. From here on, it’s like swinging on a rope under a tree. If you lift your knees, you’ll feel more balanced, and it’ll help you turn more easily. Turning your head and leading with your eyes, you’ll see what’s coming: the water, downwind, and where you’ll touch down. Once you have your bearings, you can dive into the kite as you would for a jump. This will help pull you around and give you a sense of direction for landing. Here Karine has turned her head, she’s still leading with her hands but she’s looking where she’s going. As she’s spotted where she’ll land, she’s steering her kite forward to dive it.
Landing gear Down Pic H.
Like a jump, drop your legs to get the board underneath you so you can land over it. At first, just getting around, even if it means landing on your bum and water-starting out, is perfect. Once you have the movement and feel comfortable rotating, you’ll start to know where you are and can then work on diving the kite with a bit more oomph and landing dry, even if it’s across the wind.
Excellent. It doesn’t sound too bad.
Top Tips
Choosing the right conditions to learn something new is always key. In the case of your back roll, a bigger kite and gentle power will give you more feeling and float, whilst the kite will be less whippy and easier to control. Once you’re on a small kite and powered, things can happen more quickly and, should we say, energetically.
Besides levelling the bar and extension, you need to concentrate on kicking before pulling. If you pull too early on the bar, it’s impossible to carve up and impossible to extend. You won’t rotate, and the kite won’t stay at 12.

Walk through this on land without a kite to get the idea and visualise that you’re moving forward and your hands are leading. Walk from left to right or right to left whilst rotating and leading with your hands so that you keep moving in the same direction as you will in a jump. At no stage should you be turning your head away from your hands or your body against the forward flow.
Excellent, there you have it!
Keystones
- Upwind, comfortable
- Short, sharp send
- Level bar & Out
- Carve, extend then pull
- Lead with hands, finish with head

This technique article was in Issue 106 of IKSURFMAG.
Related


By Christian and Karine
Christian and Karine have been working together as a coaching team, running improver to advanced kitesurfing clinics since 2003.
