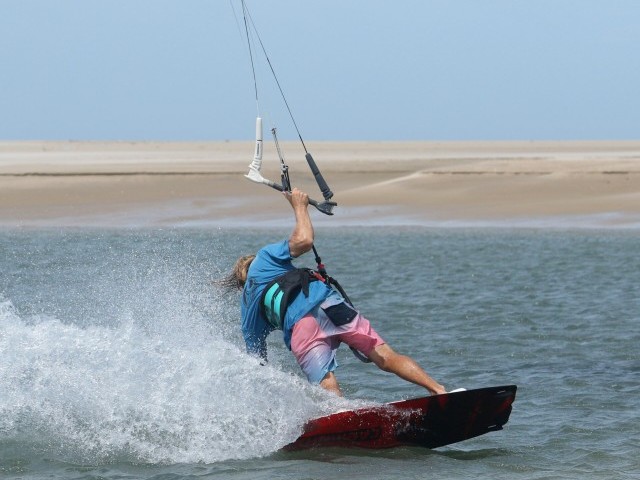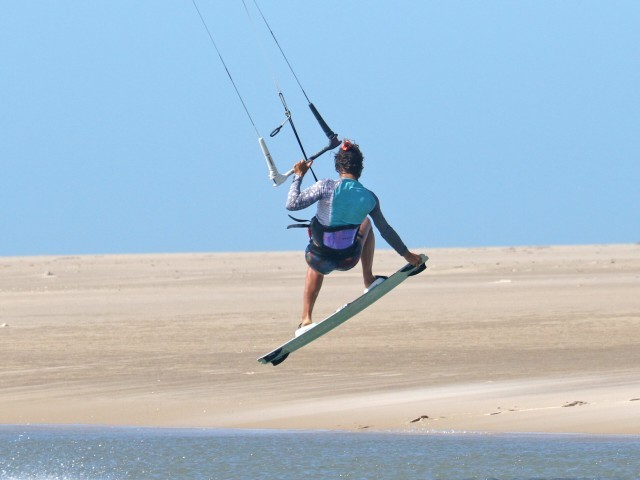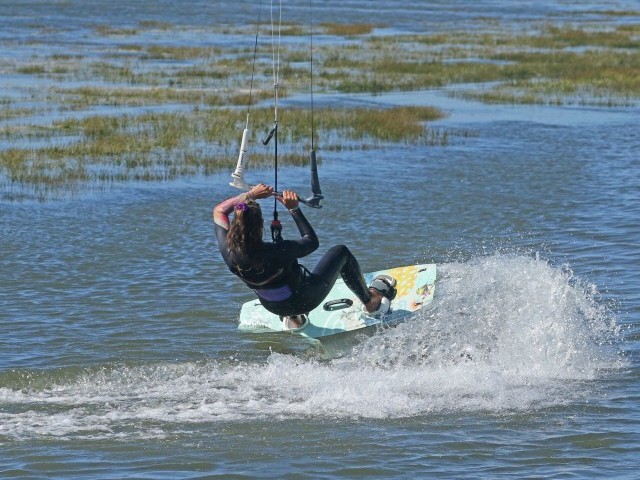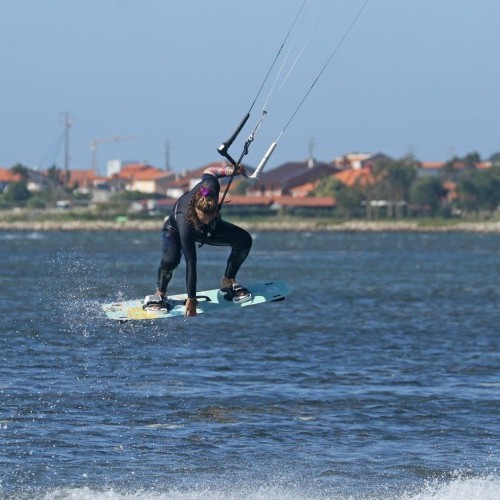
Popped Indy Grab
Technique / Intermediate
It’s been a while since we reintroduced how to pop back in IKSURFMAG 84! Hopefully, this means you’ve had plenty of opportunity to practice, hone and perfect your stomp. If the answer is affirmative, then it’s surely time to add a little spice and tart up your pop with a cheeky Indy Grab! This is a great way to style your pops and a really good grab that you can tweak more and more as you get the hang of it.
So, what is an Indy Grab? An Indy is when you grab your board with your rear hand, on the middle of your toe side edge (between your feet). The best way to get a feel for this is to sit yourself down on your derriere whilst on dry land and try lifting your knees until you can reach down and tickle the area you want to grab. The good news is that it’s harder to lift your knees and board while reaching down on terra firma than if you get some decent pop off the water.
OK, you’ve got your pop in the bag, and you know where to grab it; let’s look at what’s involved, along with a little reminder to ensure you get off the water cleanly.
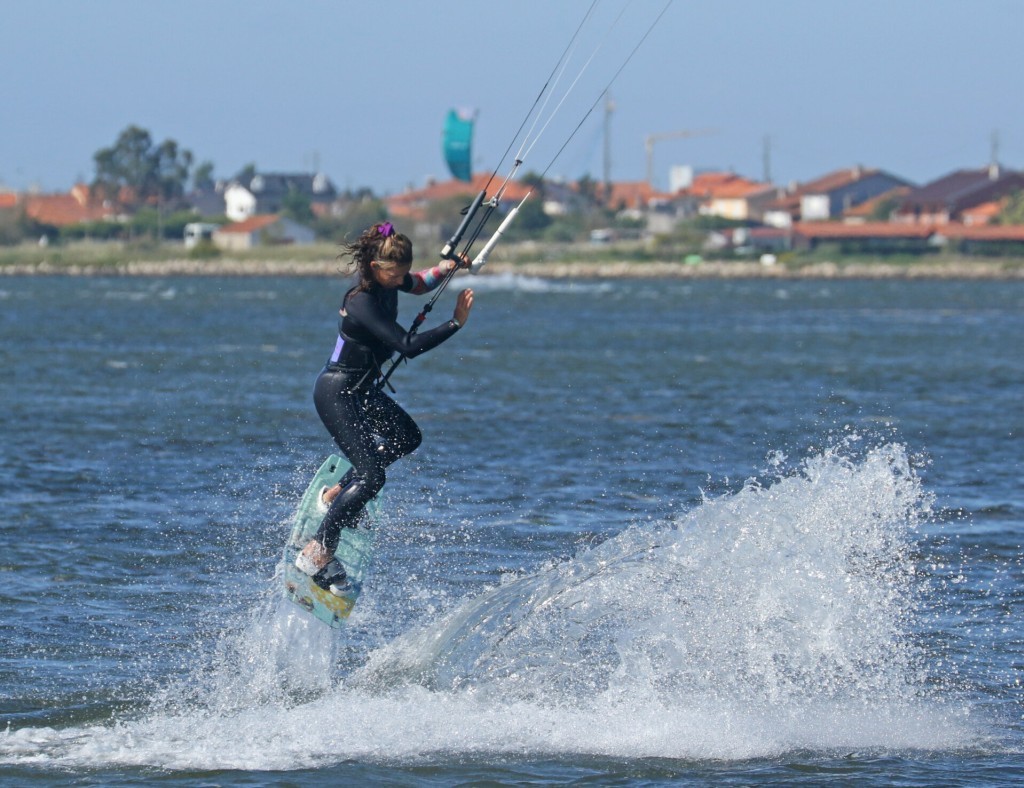
Approach and Set Up Pic A.
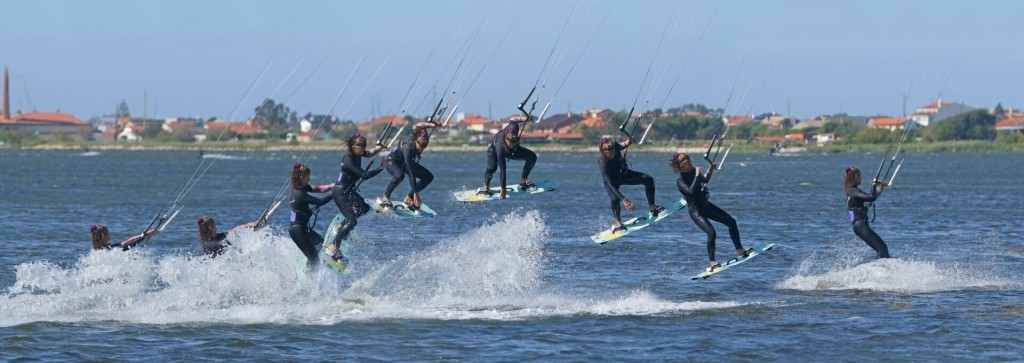
If you cast your mind back to the popping article, it’s all about getting yourself and your board to carve hard upwind so that you can stamp against your edge and pop off the water. Setting yourself up in your default popping position will put you over the tail of the board, riding with the nose of your board slightly higher than usual, and will make the whole trick more achievable. You also need to ensure that your sweet spot is within reach so you can pop it with both hands on the bar. Set your kite around the 11 or 1 o’clock mark, get your hands butted up against your depower line, drop your weight back and approach on an edge with speed. Once you’re ready, you can flatten off and bear away by softening your knees and rolling over the board. In the photo, Karine has her weight over the tail of her board, mini wheelie, both hands on the bar, kite parked at 11, and has started to bear away so that she can then carve up without the risk of grinding to a halt.
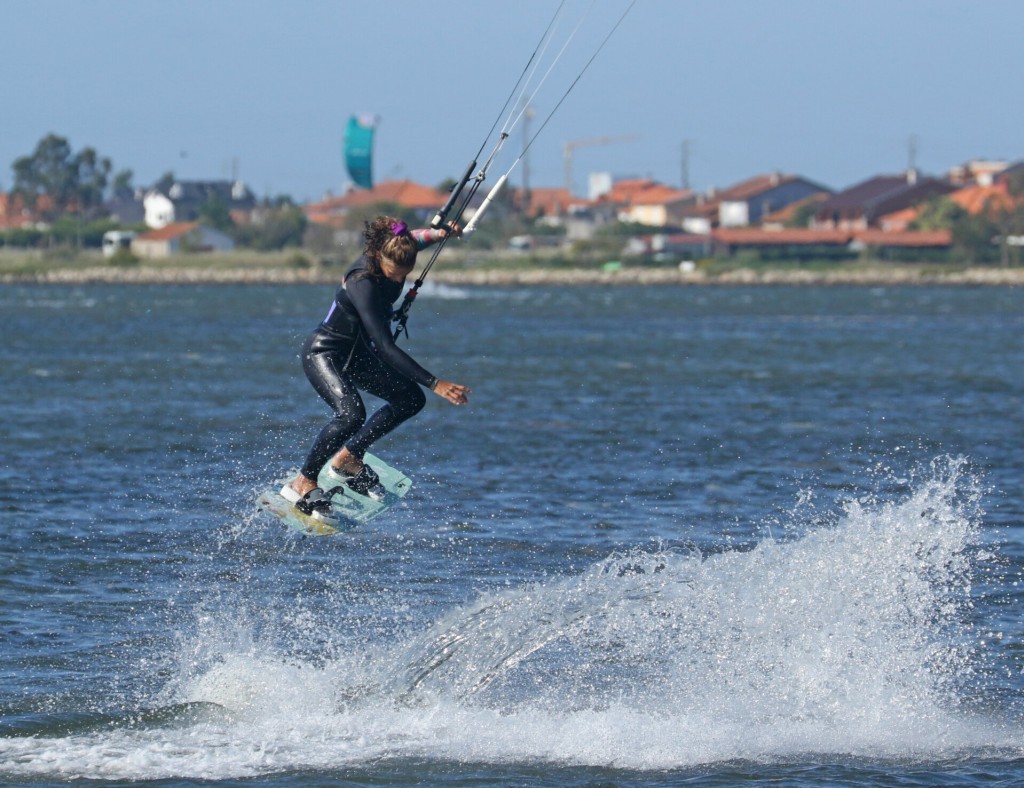
Carve & Pop Pic B.
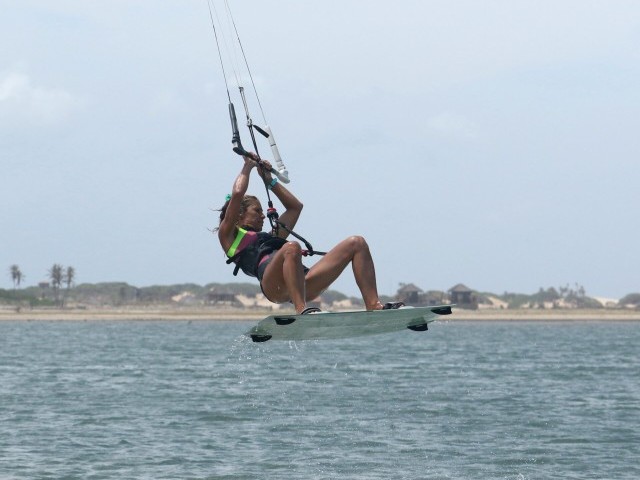
With the board flat, you’re primed to pop. The first thing is to carve hardback upwind to put tension on your lines, giving you something to pop against. Do this by dropping your weight, bum low to the water, turning your head and shoulders back upwind so that you drive against your board, carving it upwind. Remember the “carve–pop”; it still holds. You can’t carve for long, or else you’ll stop. As soon as you’re carving it’s time to pop, kicking yourself upwind and away from the board by explosively straightening your back leg and stamping your heel hard against the edge. We say it in every pop move: you make it happen; don’t wait for something to happen! You can see that Karine has carved suddenly upwind and has stamped hard, fully extending her rear leg against the board. The result is that she pops up. She still has both hands on the bar, which keeps her balanced, and her bar is out of the sweet spot. You mustn’t pull on the bar. If you do, the kite will pull against you, and you won’t be able to kick.
Release & Look Pic C.
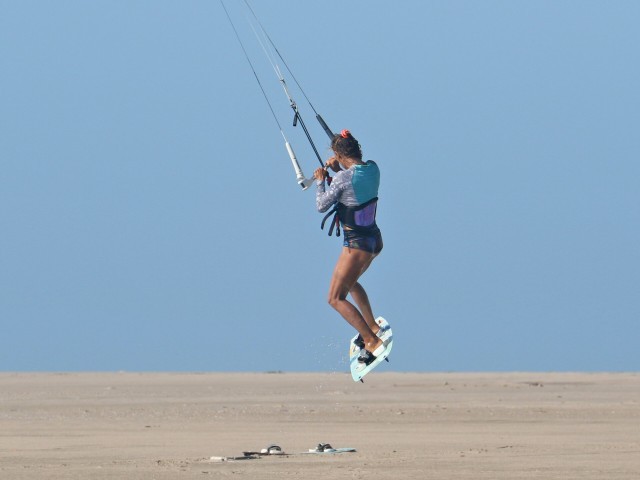
If you get your approach and pop right, this next part will be more intuitive. What we mean by this is that with better pop, the board will want to spring up towards you, bringing it nearer to you. It’ll also push you forward over the board into a more balanced position. And, of course, the better the pop, the more time to squeeze the grab in. Eyes on the prize, look down towards the board and focus on where you want to. At the same time, release your backhand. Having fully extended into her pop, Karine now targets her grab, looking at her toe side edge whilst releasing her rear hand.
Focus & Lift Pic D.
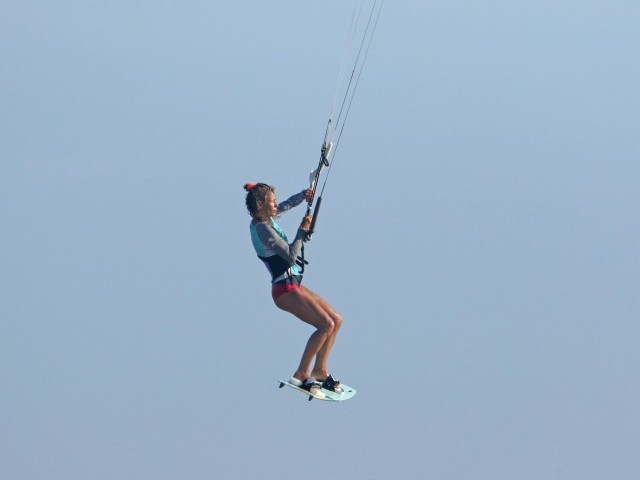
You’re in the air and balanced—it's time to get the board up. Turn your head back so that you’re looking behind your centre line. This frees you from the obstruction of your chicken look, harness, et al. and allows you to lift your knees more easily. Concentrate on lifting your front knee, as this will bring all of the board closer. See how Karine is still focused on where she’ll grab, but she’s rolling back behind her centre line whilst lifting her knees. Her front knee is pulled right up. Note how her bar is still out on or past the sweet spot. If you support yourself on the bar and pull in, the kite will pull you forward and away from the board, making the grab near impossible.
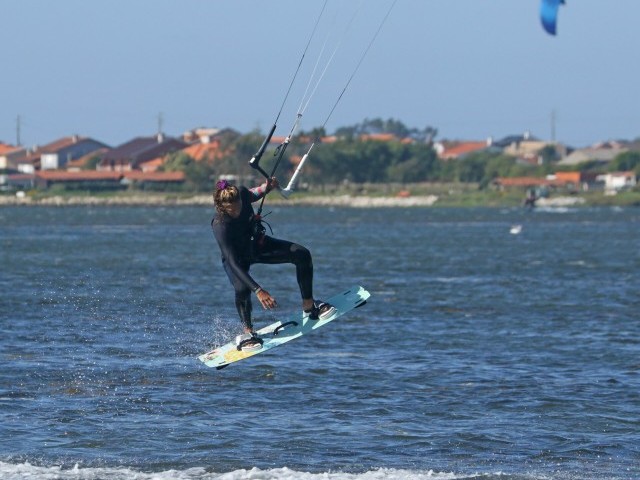
Boom Pic E.
The moment of truth, the money shot. It won’t last long, but try and get your fingers under the board to make it count. You can clearly see how Karine is reaching down and around behind the centre line, which makes the grab possible. This is so much more achievable if your air comes from pop. Using the kite for help will pull away from the board and make it feel too difficult. The bar is still out!!
Drop & Dive Pic F.
There’s no time to hang about, and whether you have a decent grasp of your toe side edge (or not), you will want to get set up for a softer landing. Two jobs: get some forward pull and drop your undercarriage. With the kite leading you at either 1 or 11 o’clock, all you need to do to soften your landing is pull the bar in. With tension on the lines, your kite will power up and drop back into the window, pulling you forward and preventing you from just dropping. Relax and let your legs and board drop under you as you do this. Karine is ready for a touchdown.
Claim It Pic G.
As your board swings under you and the kite pulls, you should end up over the board. If you can, get your weight back for a tail-first reception. Reach up for the bar with your free hand to balance and control yourself.
Top Tips.
Flat water is always going to help when learning anything popped. You’ll feel more controlled, and without chop, there’ll be more chance of keeping some momentum through your carve.
Within reason, more upwind speed on entry and a more off-wind bearing away will give you better and more controlled pop as your kite will pull from a more downwind position. The one caveat here is that kites which fly with a very upwind edge to the window will require you to be much quicker with your carve–pop!
It extends into your pop. It’s counterintuitive, as you’ll be planning ahead, thinking about lifting your legs. However, the bigger and better the stomp, the lighter and nearer the board will feel, making for an easier grab.
Common Problems
Don’t pull on the bar. Ninety-nine times out of one hundred, you’ll struggle with pop because you’re asking the bar for help. It’s all in the legs.
The kite is too high. In many pop moves, we suggest using the kite for a bit of help, but not in this one. The board will feel heavy and far off if the kite lifts and supports you.
Tindy? It’s very likely that you’ll first grab near your back foot. It is more easily reachable as you’ll likely concentrate on bringing the back leg up whilst inadvertently extending the front leg away, especially if you’re accustomed to tail grabbing in jumps. You need to override your muscle memory and concentrate on bringing the front knee up, bringing the Indy within reach.
Keystones
- Hands centred, kite 11 or 1
- Weight back, bear away
- Carve – pop, bar on the sweet spot, fully extend for maximum spring
- Look back and down, lift the front knee
- Grab between your feet. Pull on the bar for landing.
This technique article was in Issue 105 of IKSURFMAG.
Related
By Christian and Karine
Christian and Karine have been working together as a coaching team, running improver to advanced kitesurfing clinics since 2003.


